Step by Step Guide: Designing Hardscape Layouts That Prevent Erosion

Andrew Larkin • January 28, 2026

If you’ve spent more than a year in Iowa, you know the drill. The weather here doesn't just change; it has mood swings. One minute, we are looking at a drought, and the next, we are getting three inches of rain in an hour. Then winter hits, freezes everything solid, and thaws it out just fast enough to turn your backyard into soup.

All that water has to go somewhere. Unfortunately, for a lot of folks in our area, “somewhere” usually means right into the basement or washing halfway down the street, taking the topsoil with it.

We can’t tell you how many properties we’ve walked continuously where the homeowner thinks they are just dealing with a bit of mud. They see a wet spot that won’t dry out or a sidewalk that’s always gritty. But that’s not just mud. That is erosion. It’s your property value literally floating away.

The good news? You don't have to live with a yard that disappears every time it storms. 
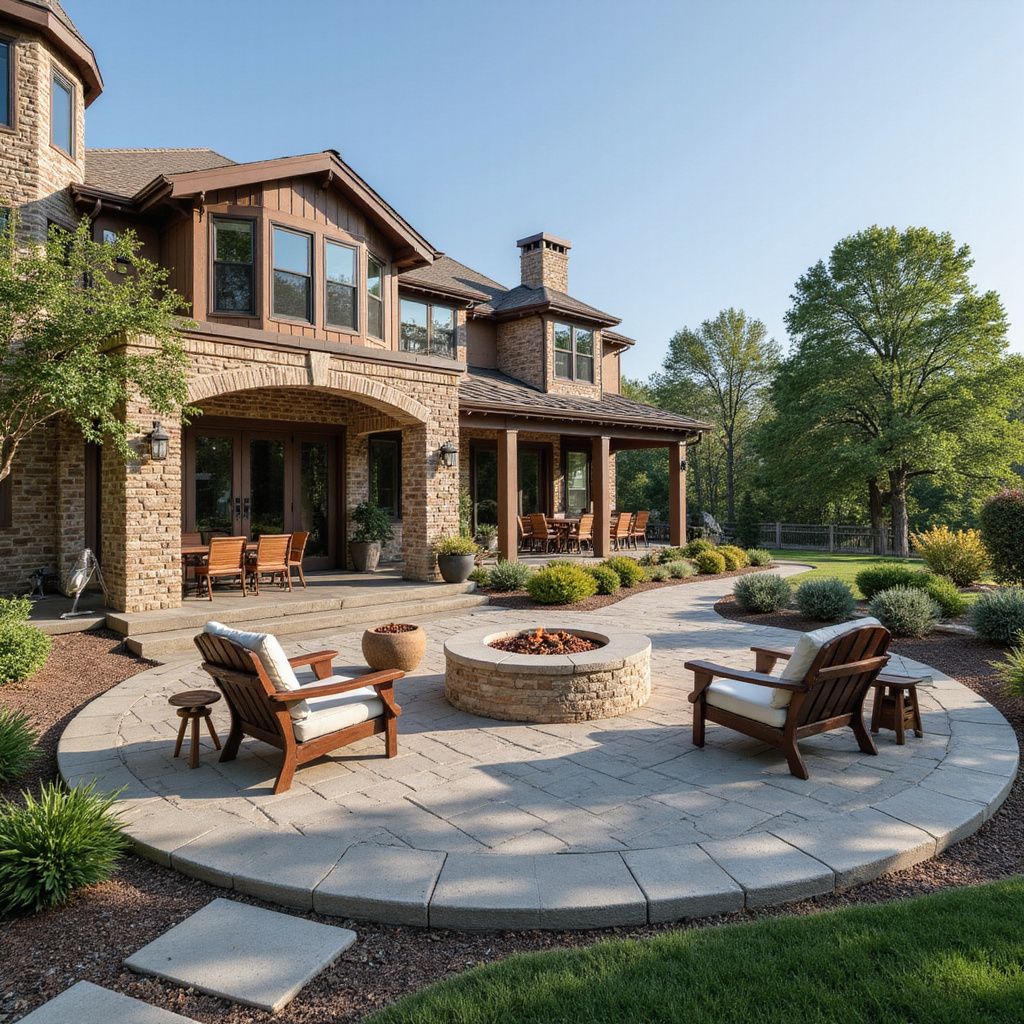
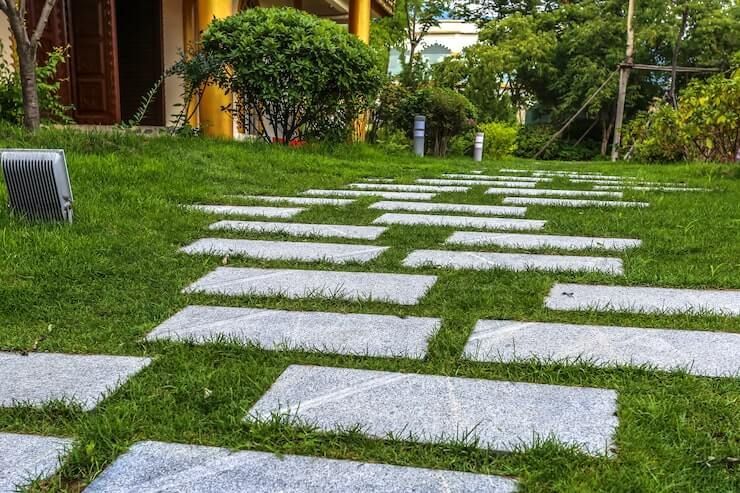
Hardscaping is often seen as just the “pretty stuff” (the patios, the fire pits, the walkways). But when we design a project at Larkin Landscape & Design, we are using those elements as engineering tools. We are building a layout that locks your soil in place and tells the water exactly where to go.

Here is a look at how we actually do it, step by step, from the initial muddy boots consultation to the final walkthrough.


1. It Starts with “Reading” the Water

Before we even think about bringing in a skid loader or ordering pavers, we have to play detective. You cannot fight gravity, and you definitely cannot fight water. You have to work with them.

When we first step onto a property, we’re looking for the story the land is telling. Where is the water coming from? Is it dumping off the neighbor’s roof? Is there a natural swale running right through the planned patio area? In a lot of these newer suburbs, the grading is done fast and cheap, leaving you with slopes that channel water straight toward your foundation.

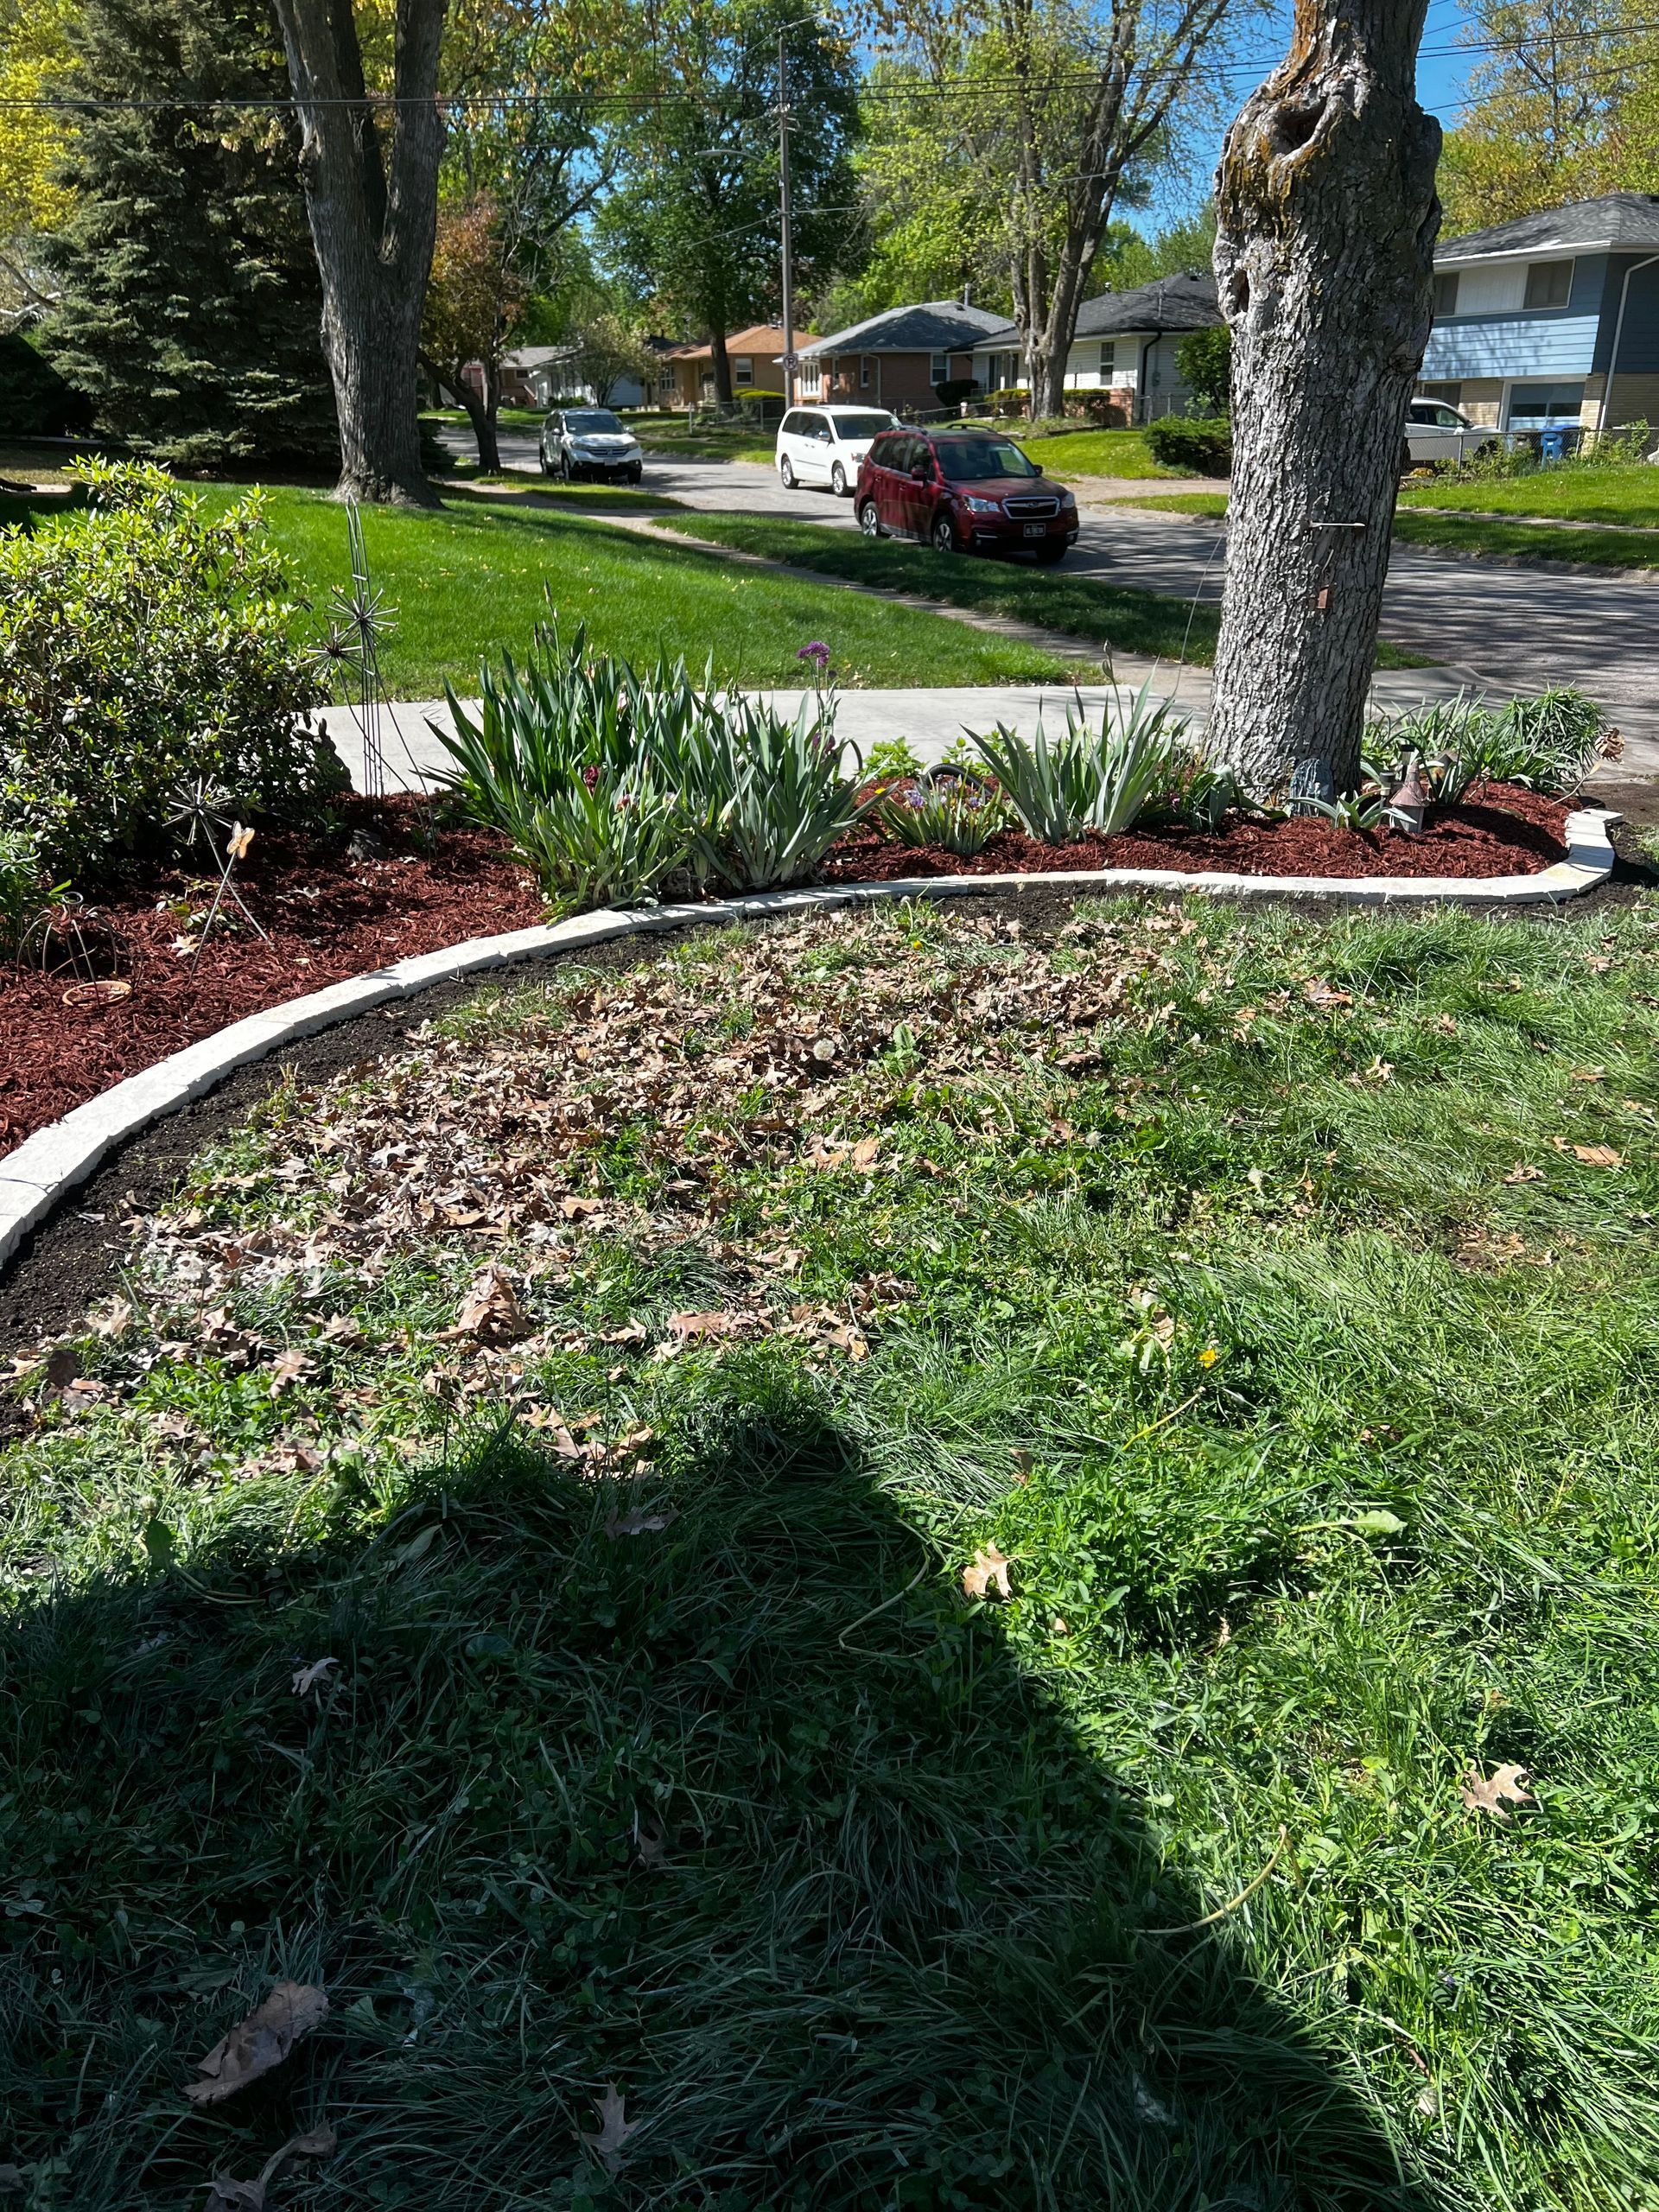
We look for the subtle “tells” that erosion is happening right under your nose:

  • Tree Roots Showing Off: If you see the tops of roots that used to be underground, that soil didn't just vanish; it washed away.
  • The “Rills”: After a storm, look for those tiny, carved-out channels in the dirt. Those are basically mini-rivers carrying your yard away.
  • Driveway Silt: If you have to sweep sand or dirt off your concrete after a rain, that sediment comes from your lawn.
  • The Mush Factor: Areas that stay squishy for days after the rain stops are a sign that the water has nowhere to go.

If we just plopped a patio down without fixing these issues, we’d basically be building a dam. The water would back up, undermine the base, and ruin the investment. We have to map the flow first.


2. Grading: The Heavy Lifting

Once we know the water's path, we usually have to move some dirt. This is where hardscape erosion control really begins. It’s not glamorous work, but it’s the most important part of the job.

Think of grading as sculpting the earth. On a steep slope, water picks up speed. The faster it moves, the more damage it does. We often have to terrace the slope, creating flat “steps” in the yard.

We cut into the high spots and fill the low spots to create level zones. This does two things: it slows the water down so it can't strip away soil, and it gives you usable space. A steep hill becomes a flat upper patio and a lower garden.

Even on flatter yards, we have to be precise. We aim for a subtle slope away from the house, usually about 2%. It’s enough to keep your basement dry, but not enough to feel like you’re walking on a ramp. We use laser levels for this because “eyeballing it” is how you end up with a flooded living room.


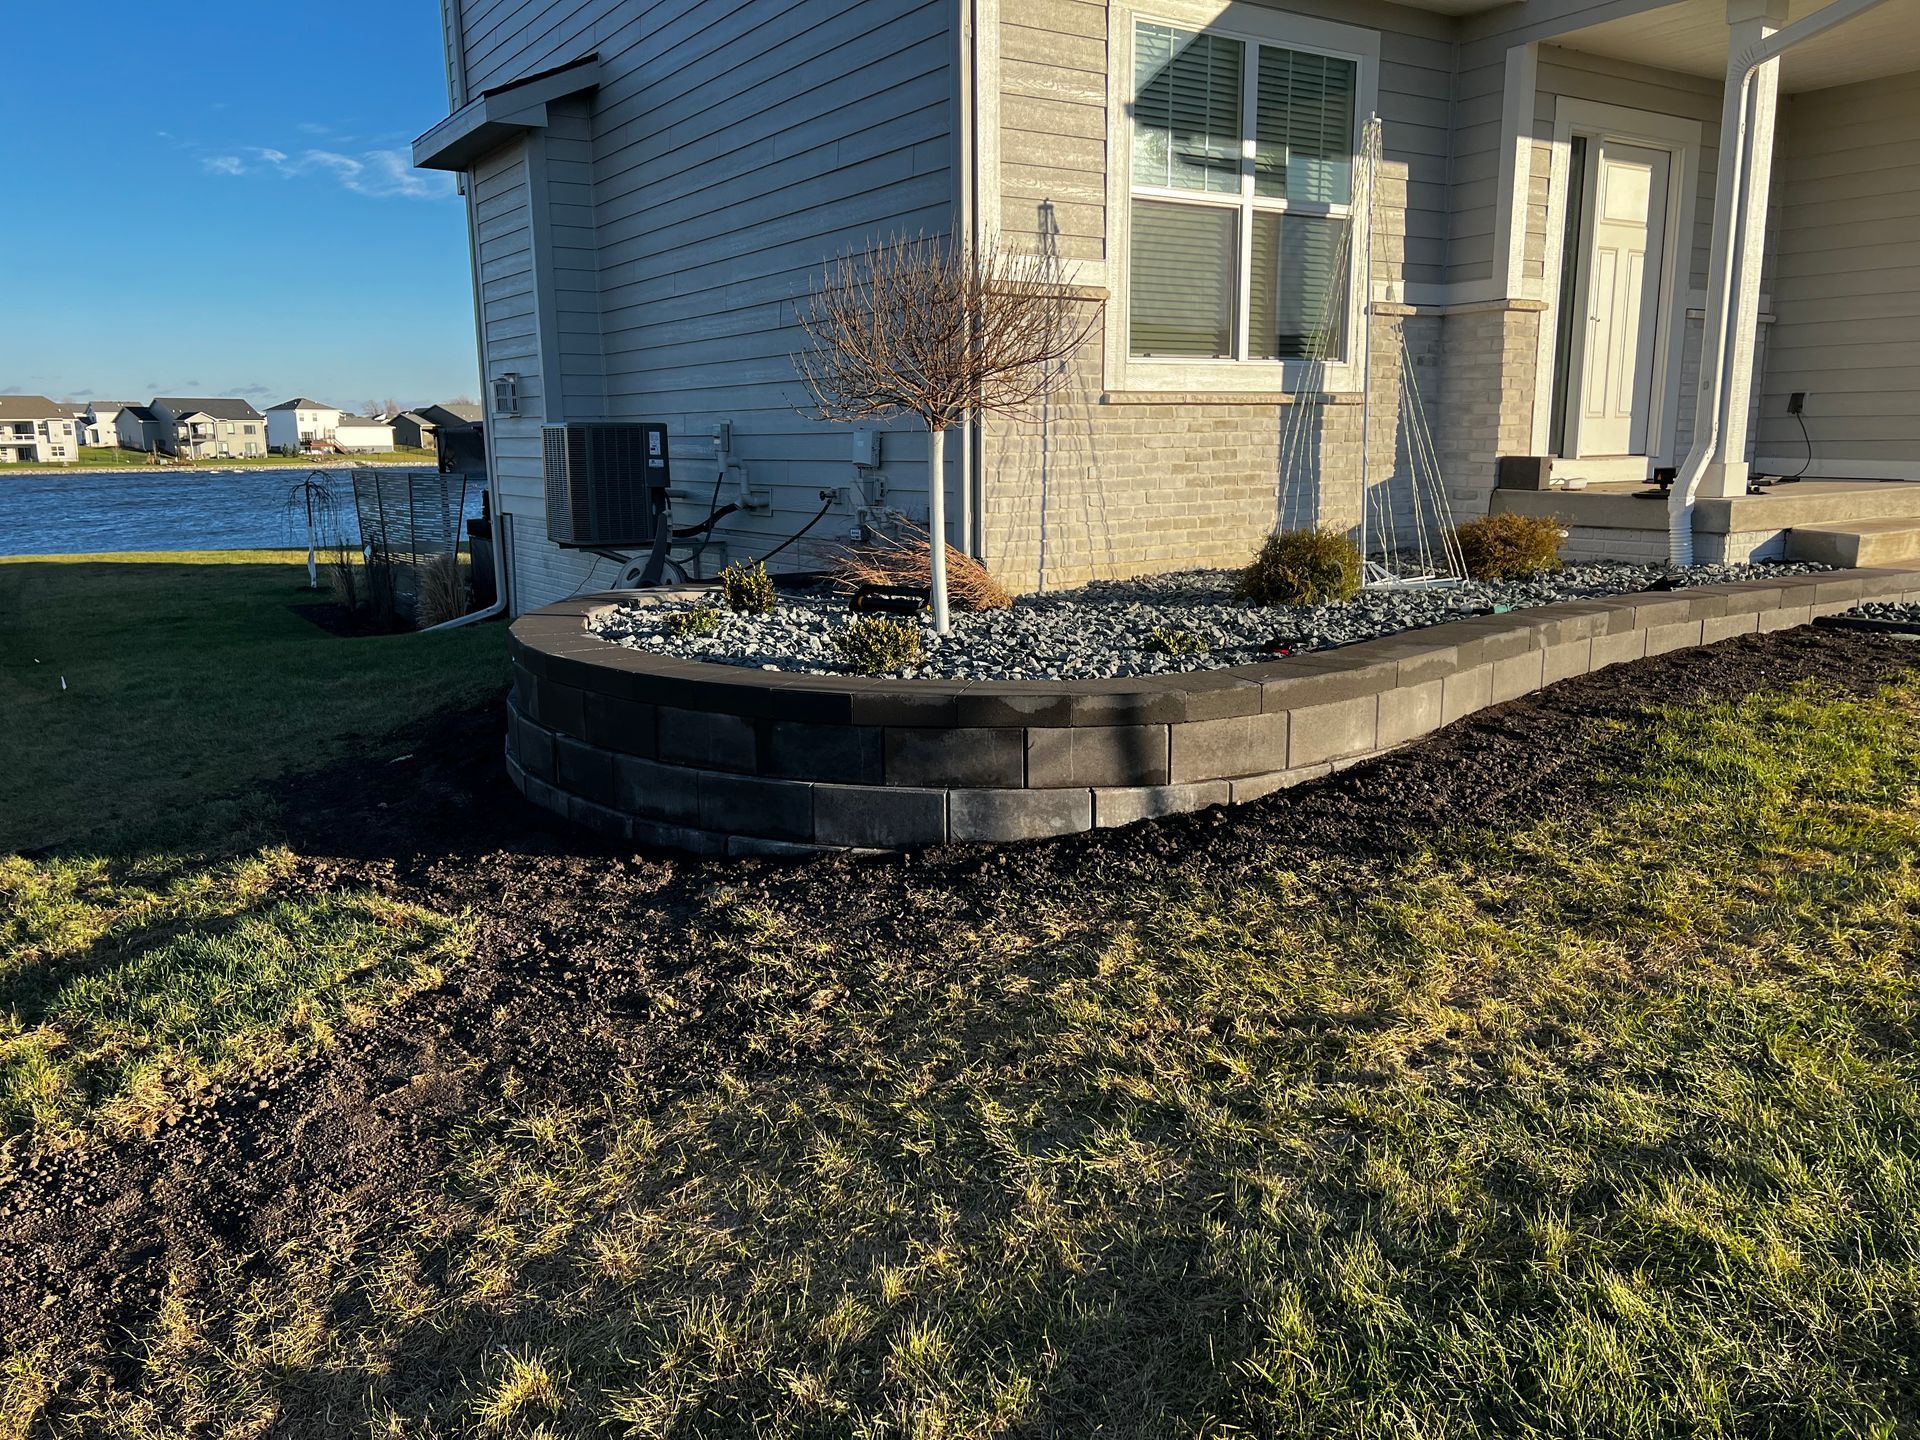
3. Retaining Walls Are More Than Just Stacked Stone

If you have a hilly yard, a retaining wall is your best friend. But there is a right way and a wrong way to build them.

In Central Iowa, we deal with heavy clay soil. Clay is tricky. When it gets wet, it gets heavy and expands. When it dries, it shrinks. That constant movement puts massive pressure on walls. That’s why you see so many DIY walls leaning over after a few winters.

To make sure our walls actually hold back the earth, we use some specific techniques:

  • The Lean: We build walls with a “batter”, a slight backward lean into the hill. It helps the wall push back against the soil pressure.
  • The “Burrito” Drain: Behind the wall, there’s a zone of clean gravel wrapped in fabric. This lets water drop down to a drain pipe instantly.
  • Relieving the Pressure: If water gets trapped behind a wall, the hydrostatic pressure can be strong enough to topple concrete. We make sure that water has an escape route so the wall doesn't have to fight it.

We build these things to last. We aren't just stacking blocks; we are building a fortress against slope failure.


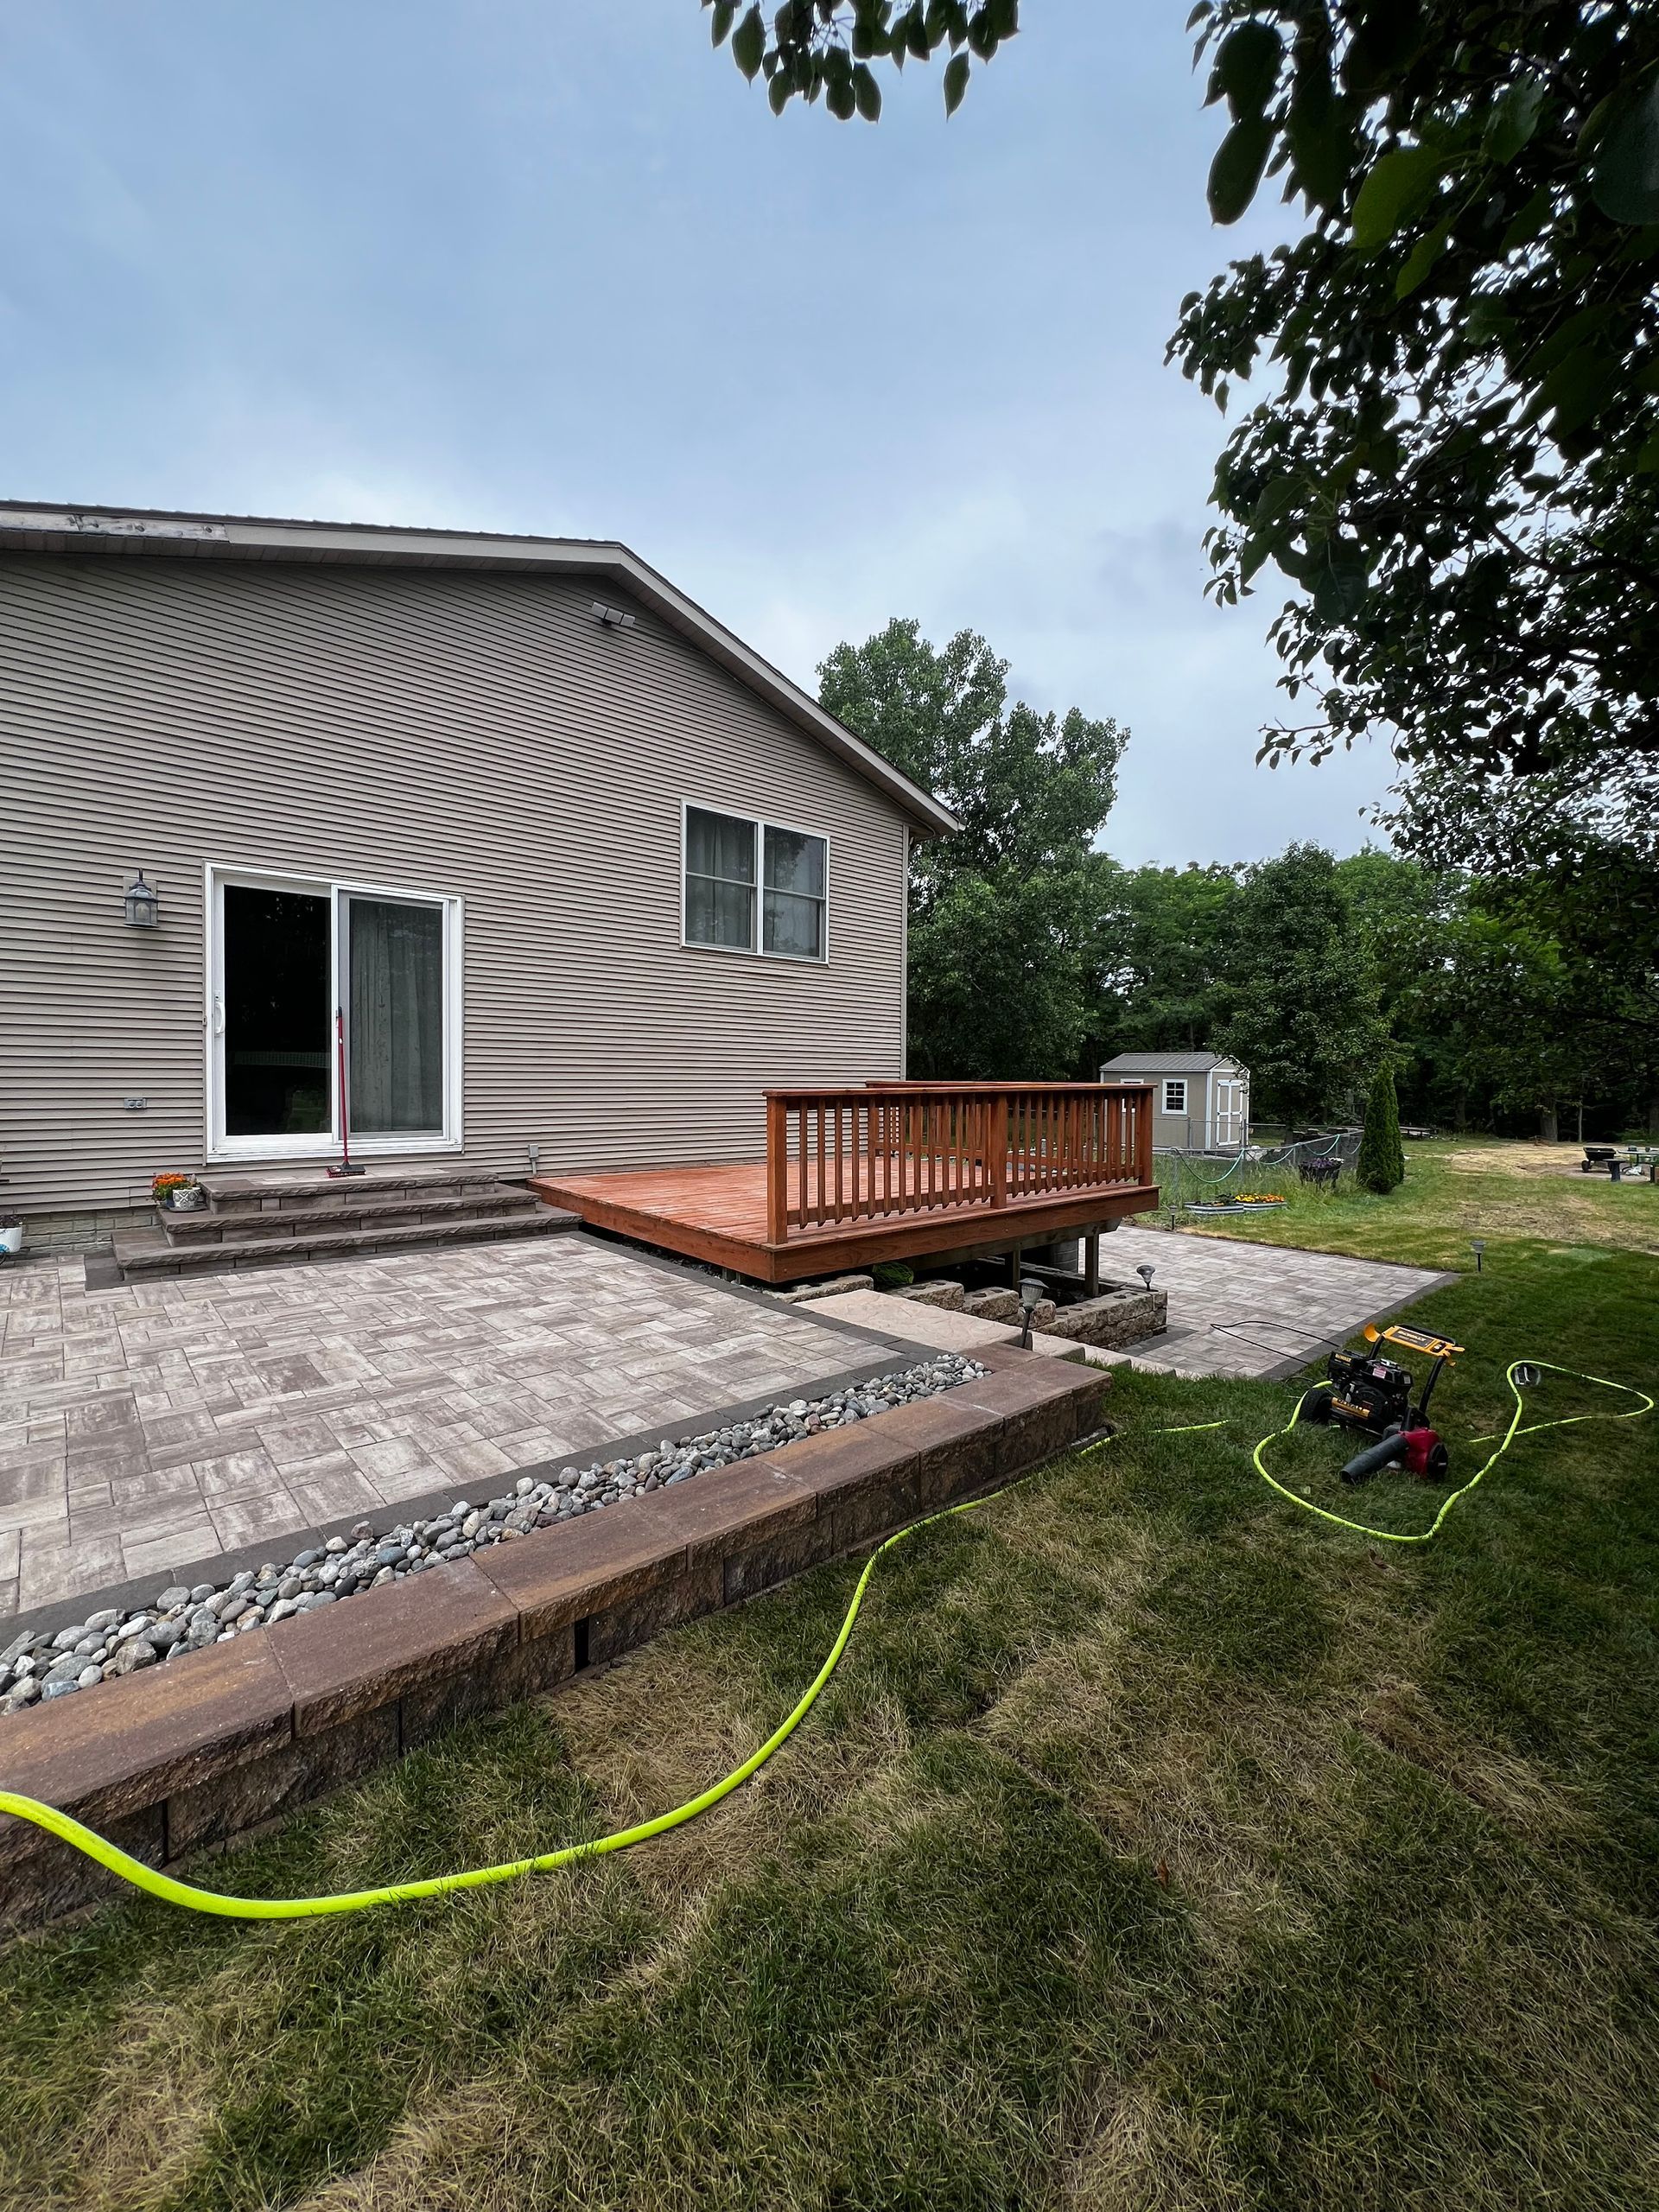
4. Why We Love Permeable Pavers

Old-school thinking was that to stop erosion, you cover the dirt with concrete. The problem? Concrete acts like a slide. Water hits it, speeds up, and shoots off the edge, blasting out the grass or mulch next to it.

That is why we are big fans of permeable paver systems. These aren't just regular bricks with gaps. The magic is underneath. They sit on a deep bed of jagged rock, not sand.

When it rains, the water doesn't run off the patio; it runs through it. It disappears between the stones and hangs out in the rock base underneath until it can soak into the ground naturally.

This stops that “waterfall effect” at the edge of your hardscape. Plus, in the winter, you get less ice buildup because the melting snow has somewhere to go immediately. It’s a smarter way to pave.


5. The Plumbing of the Landscape

Sometimes, grading isn't enough. You need a dedicated system to move water from Point A to Point B without wrecking the yard.

We don't want to move the erosion problem to a different spot. To really prevent erosion with hardscaping, we have to manage the exit. We use a mix of tools to handle this:

  • Catch Basins: Think of these as the goalie. They sit at the low points and catch surface water before it can pool up.
  • Smooth PVC Pipe: We never use that crinkly black pipe from the hardware store. It crushes and clogs. We use rigid, smooth pipes so water flows through them.
  • Pop-up Emitters: This is where the water comes out, usually way out in the yard, where it can disperse safely without washing anything away.
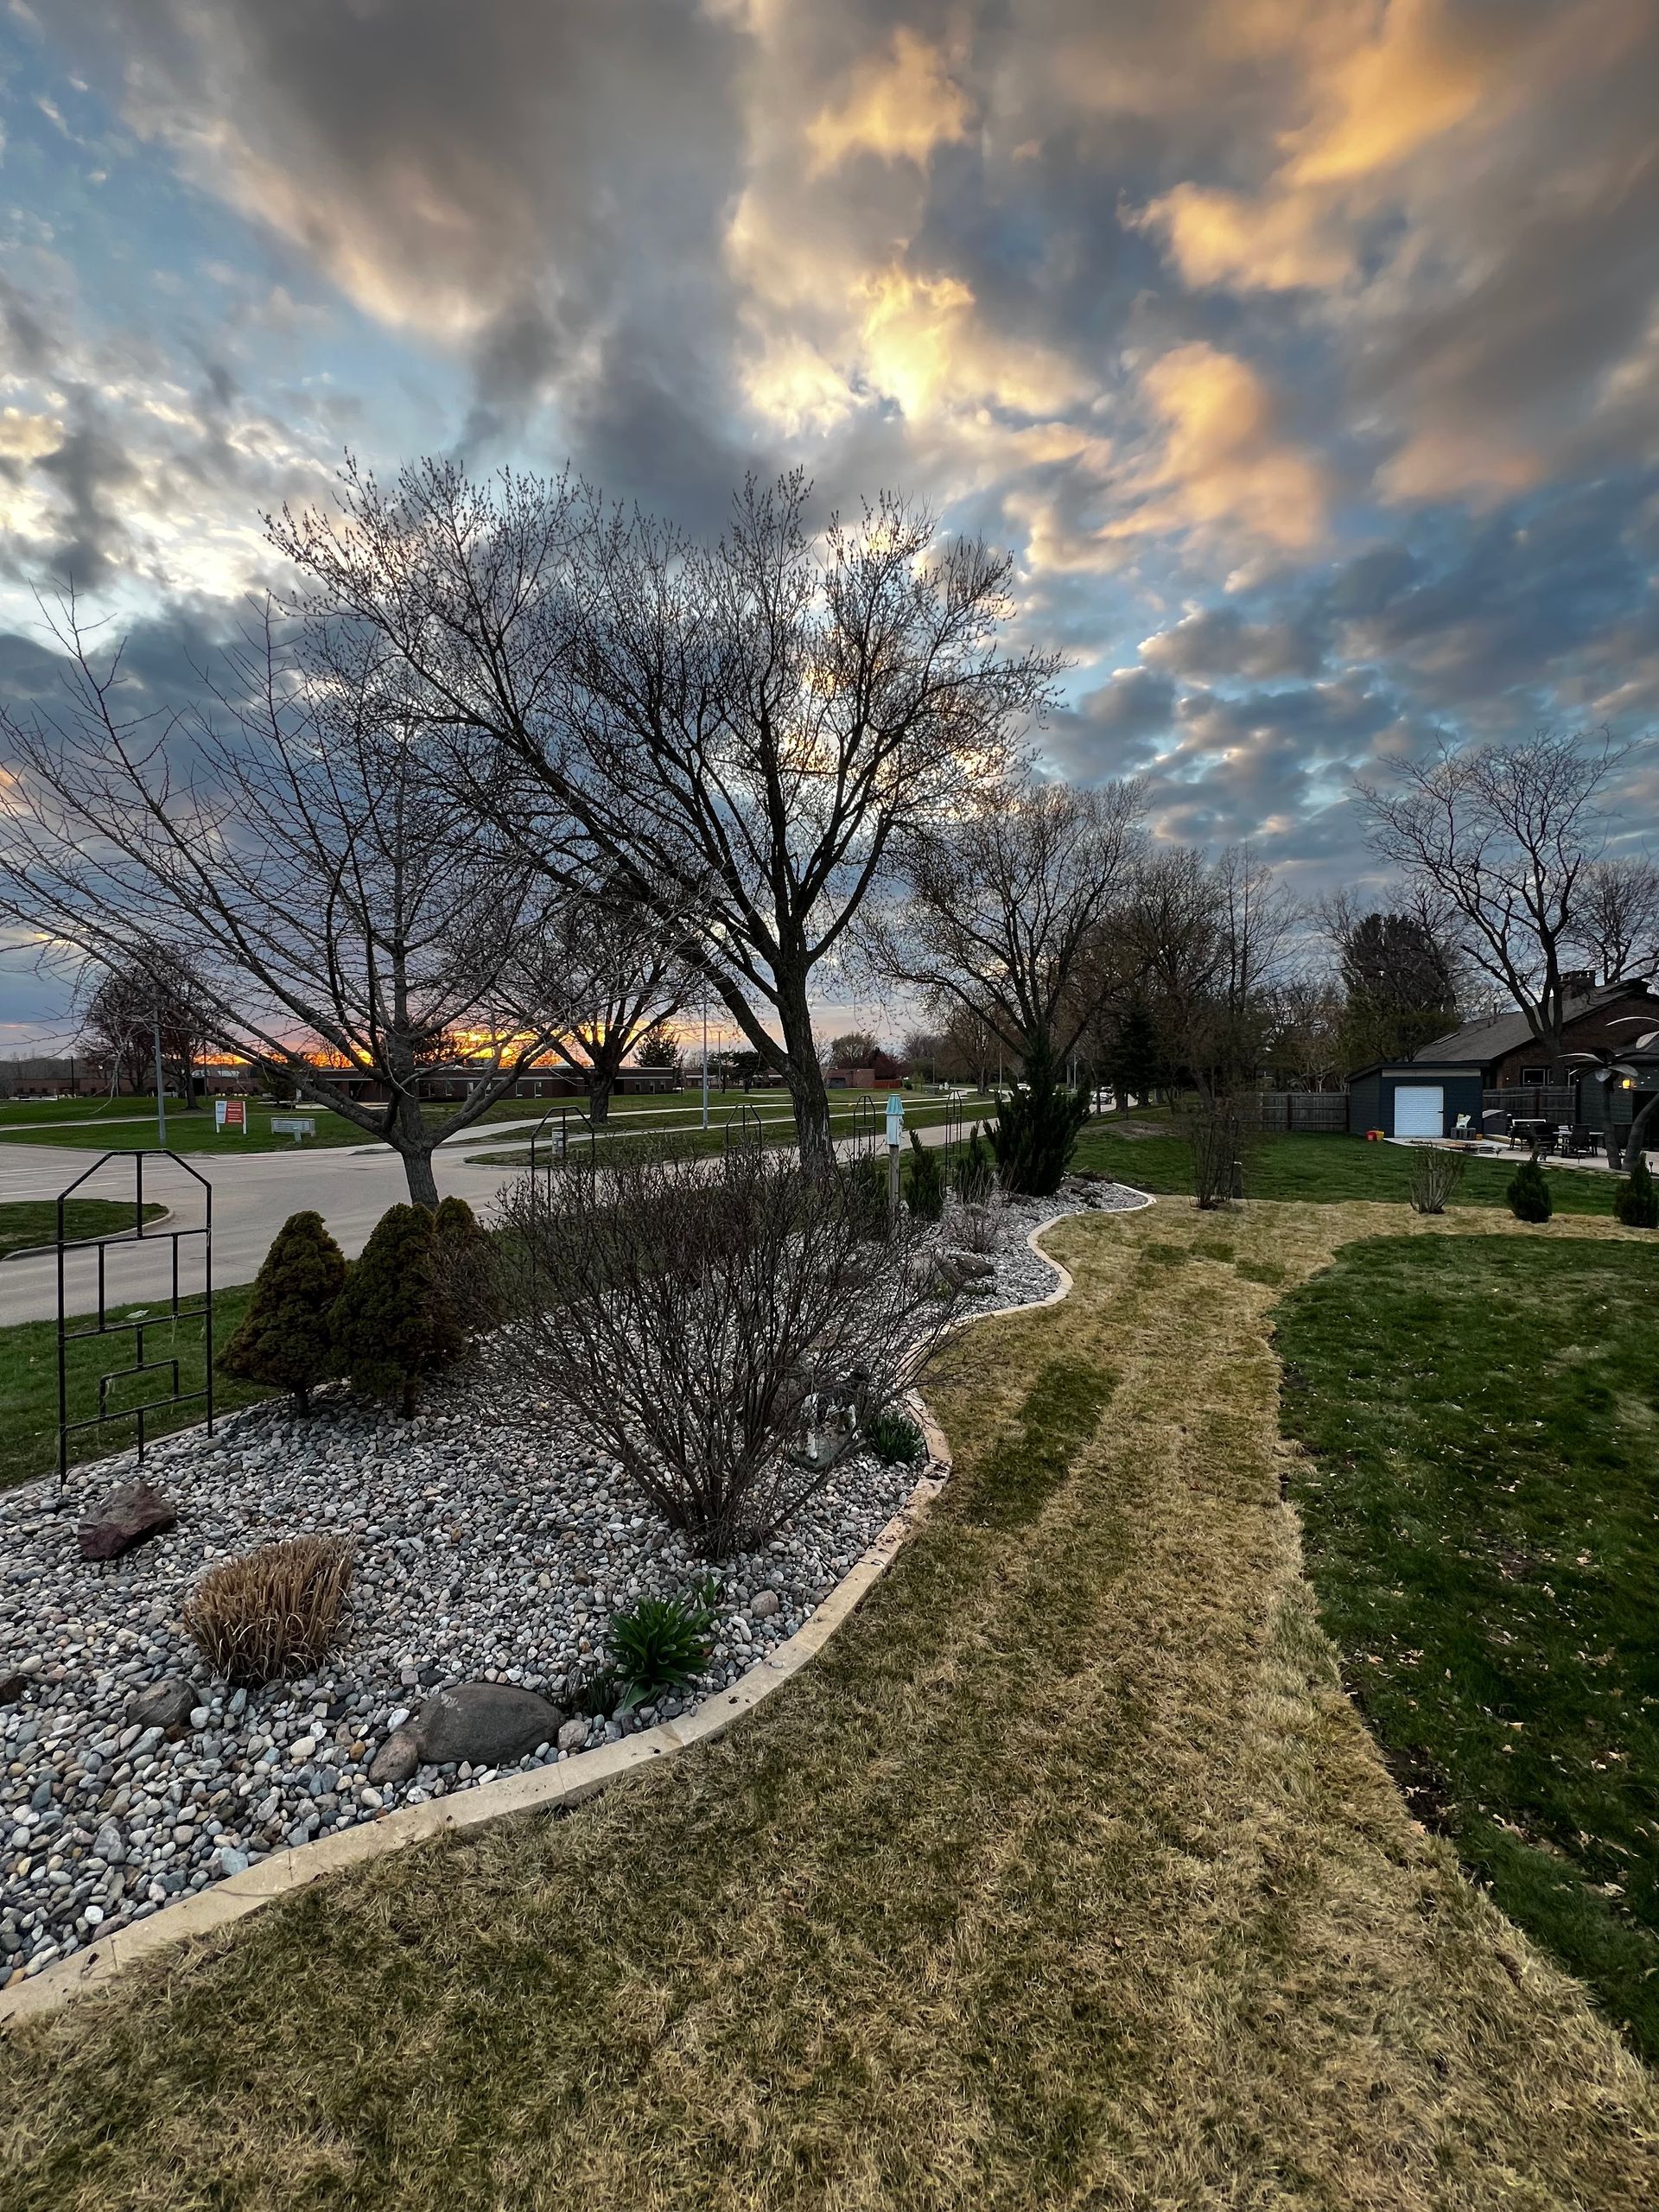
  • Swales: These are shallow grassy dips that look natural but act like invisible rivers during a storm, guiding water around your new patio.


6. Softscaping: The Roots of the Operation

Hardscape needs softscape. They work together. A retaining wall looks great, but it needs plants to really lock that soil down.

After the stone is laid, we plant specifically for stability. We want plants with deep, tough root systems. Native prairie plants are beasts at this; some of their roots go down 10 feet.

We often build planter boxes right into the design. It softens the look of all the stone, but it also acts as a sponge. The stone handles the heavy traffic, and the plants handle the water absorption. It’s a living barrier against erosion.


7. Building for the Freeze-Thaw

We can't ignore the Iowa winter. Water expands about 9% when it freezes. If water gets inside a cheap brick or a crack in the concrete, it acts like a jackhammer when the temperature drops.

That freeze-thaw cycle causes spalling (where the face of the brick pops off) and cracking. Once a crack starts, erosion starts underneath it.

We are picky about materials. We use high-density pavers and natural stone that don't absorb much water. But honestly, the most important part is what you can't see, the base.

We compact the gravel foundation in layers. We pound it until it’s rock solid. If the base doesn't move, the patio doesn't settle. No settling means no low spots (we call them birdbaths) that collect water and start the cycle of deterioration.


8. Keeping it Working

Even the best hardscape drainage design isn't maintenance-free. We always walk our clients through what they need to watch for to keep the system running smoothly:

  • Clear the Grates: In the fall, leaves love to cover up catch basins. Kick them off so the water can get in.
  • Watch the Spouts: If a downspout extender falls off, put it back. Roof water is powerful and can drill a hole in your base in one storm.
  • Check the Edges: If you see dirt pulling away from the paver edge, fill it in. Don't let water tunnel underneath.
  • The Outlet: Make sure the end of the pipe isn't buried in mulch or grass so the water can actually get out.


The Bottom Line

Ignoring erosion is expensive. Trust us, it is way cheaper to put in a retaining wall or a proper drain now than it is to jack up a sinking foundation or replace a heaved driveway five years down the road.

At Larkin Landscape & Design, we treat hardscaping as a long-term investment. We use 2D design tech so you can see exactly how we are going to fix the slope and where the walls will go before we ever dig a hole.

Our “Iowa-Proof Builds” aren't just marketing fluff. We live here. We know what this soil does. Whether you are in Ankeny, Grimes, or Urbandale, your yard needs a defense system.

If you are seeing washouts, standing water, or a patio that’s starting to dip, don't wait for the next big rain to make it worse. Let’s get a layout in place that keeps your soil exactly where it belongs.

Recent Blogs

By Andrew Larkin April 3, 2026
Have you ever pulled up to a house at night and admired how amazing it looks from the street? The architectural features are perfectly illuminated, and the front walkway is safely lit with a warm, inviting glow. That striking curb appeal takes a solid plan, quality fixtures, and a reliable power source working behind the scenes. To bring your outdoor spaces to life after the sun goes down, you first need to understand how a landscape lighting transformer safely powers your entire setup. Think of this essential piece of equipment as the beating heart of your outdoor illumination system. Here in the US, the electricity flowing through your home's standard wall outlets is a highly powerful 120 volts, which is exactly what you need to run your heavy indoor appliances. However, taking that standard 120-volt power and running it directly into your garden beds or stringing it up in your favorite shade trees is generally not a smart idea for a typical residential yard. That high voltage requires extreme safety measures, making a dedicated step-down system an absolute necessity for your backyard. Why the Standard 120-Volt Approach Fails Outdoors Using full line voltage outdoors requires deep trenching, heavy-duty rigid conduit, and strict building code compliance to ensure nobody gets seriously hurt while digging in the dirt. It is an incredibly labor-intensive and expensive way to light up a few mulch beds around your foundation. The primary, critical job of a power box is to take that standard 120-volt house current and step it down to a much safer, far more manageable 12 or 15 volts. This massive reduction in power creates a backyard environment where you do not have to worry about serious electrical hazards. Dealing with high voltage outdoors presents too many risks for the average homeowner trying to maintain their own property casually. By stepping the power down right at the source, we eliminate those severe dangers and make yard work completely stress-free. This is exactly why the professional landscaping industry has completely shifted away from direct line voltage for standard residential setups. Here are the main reasons we actively avoid using standard line voltage for exterior projects: ● Tearing up your lawn: Installing high-voltage lines means digging deep trenches right through your grass. You end up ruining your turf to bury the wires, which costs you more money to fix later. ● Fighting city red tape: Full-power electrical work forces you to pull costly permits and wait around for local inspectors. It takes a simple yard project and turns it into a stressful waiting game. ● Dangerous yard work: Burying full line voltage turns routine gardening into a huge safety hazard. Hitting one of those active wires with a shovel while planting a bush could easily send you to the hospital. ● You are stuck with it: Once that heavy conduit is buried deep in the dirt, you cannot easily move things around. If you want to shift a light next summer to highlight a growing tree, you are completely out of luck. Why We Champion Low-Voltage Landscape Lighting for Your Yard When we sit down to design and build outdoor spaces at Larkin Landscape and Design, we almost exclusively steer our clients toward lower-power options. The benefits of installing low-voltage landscape lighting are too good to ignore, and it truly changes the way you and your family interact with your property after dark. It provides an incredible balance of safety, efficiency, and stunning visual appeal that older systems cannot match. Plus, the sheer variety of fixture styles available for these systems allows us to match your home's unique architectural vibe perfectly. Prioritizing Safety in Your Backyard Space First and foremost is the incredible safety aspect we just touched on regarding stepped-down electricity. You can confidently let your kids play tag in the yard, host neighborhood get-togethers, or let the family dog roam around without the stressful fear of high-voltage lines running right under the turf. When you are dealing with a mere 12 volts, the risk of a dangerous, life-threatening shock is virtually eliminated. For most homeowners across the country, that peace of mind alone is worth the entire investment in upgrading their exterior aesthetics. The Unmatched Flexibility of the System Beyond safety, there is the incredible flexibility that this type of lower-power setup naturally offers over time. Since the cables do not need to be buried three feet underground in thick PVC pipes, we can be incredibly creative with where we place your light fixtures. Landscaping is a living, breathing thing that naturally changes, grows, and matures over the years. Moving the wires in a stepped-down system is a relatively quick and painless process that doesn't require tearing up your entire lawn. Energy Efficiency and Your Monthly Utility Bill Energy efficiency is another massive, undeniable win for property owners looking to upgrade their nighttime curb appeal. When you combine a stepped-down power supply with modern, high-quality LED fixtures, your electrical consumption drops drastically compared to older methods. You can run an entire property's worth of beautiful, bright LED lights on a fraction of the electricity it used to take to power just a handful of old-school halogen bulbs. This means you can enjoy a welcoming home every single night without bracing yourself for a high utility bill. The Math Behind Your Setup: Sizing It Right One of the most common questions we get from clients during the planning phase is how to figure out what size unit they actually need. Buying a box that is too small means your lights will be dim, flickering, or simply won't turn on at all because the system is overloaded. On the flip side, buying one that is vastly oversized means you spent good money on electrical capacity you will never realistically use. Finding the sweet spot requires a little bit of basic planning before you purchase any equipment. Calculating Your Total Wattage Load Figuring out the right size involves a little bit of simple math based on the fixtures you select. Every single light fixture you buy will have a specific wattage rating printed clearly on the box or the bulb. For example, a standard LED path light marking your front walkway might draw 3 watts, while a powerful LED spotlight used to wash a brick facade might draw 7 watts. To find your total load, you just add up the wattage of every single fixture you plan to connect to that specific power box. Applying the 80% Rule for Maximum Longevity Here is the golden rule that we always follow in the professional landscaping industry: you never want to max out your equipment's capacity. We always apply the 80% rule, meaning you should only load the unit up to 80% of its maximum advertised limit. This crucial practice keeps the internal electrical components from working too hard and prevents the core from overheating. By reducing the constant strain on the system, you drastically extend the lifespan of the equipment and protect your investment. Pro Tip: Always leave at least 20% to 30% of your power supply's capacity completely open! As your landscaping naturally grows over the years, you will inevitably want to add a few more fixtures to highlight new trees or expanded patios. Having that extra capacity built in saves you from having to buy a second box later down the road. How to Choose the Best Landscape Lighting Transformer for Your Home When you start shopping around or looking at quotes, you will notice that the market is absolutely flooded with different equipment options. They range from cheap, flimsy plastic boxes at the local big box hardware stores to heavy-duty, professional-grade units used by contractors. Finding the best landscape lighting transformer really comes down to balancing modern convenience features with durable build quality. You need a device that can survive our unpredictable weather outdoors while making it incredibly easy to control your yard. Housing Materials Built to Last First, you must look closely at the housing material protecting the internal electrical components from the elements. We strongly recommend investing in a unit with a heavy-duty stainless steel enclosure for maximum durability over the years. Our weather can be completely unpredictable, bringing heavy spring rainstorms, blistering summer heat, and brutal winter freezes. Cheap plastic housings will eventually crack, warp, and let moisture inside after just a few rough freeze-thaw cycles, destroying the sensitive electronics inside. Control Mechanisms for Ultimate Convenience Next, consider the control mechanisms and decide exactly how you want your lights to turn on and off each evening. The most basic, old-school units use a simple mechanical pin timer, where you physically push down little plastic tabs to set the hours. These are fairly reliable, but you have to manually adjust them every time the seasons change, and the sun starts setting earlier or later. A massive step up from that is an astronomical timer, which digitally tracks sunset times based on your local zip code. The Essentials of Outdoor Lighting Transformer Installation Dropping the voltage down makes the whole setup way safer for DIYers, but don't let that fool you into rushing the job without a solid game plan. At the end of the day, handling your outdoor lighting transformer installation means you are still tying directly into your home's main electrical panel. If you try to cut corners, guess on the wiring, or ignore basic building codes, you are just asking for a massive headache. Sloppy electrical work is a guaranteed recipe for constantly tripped breakers, fried fixtures, and serious fire hazards right outside your front door. The Nuances of the Setup Process The box must be mounted in the correct location right from the start to ensure proper functionality and safety. It needs to be placed on a sturdy exterior wall or a dedicated wooden post, usually right next to an outdoor outlet. You must ensure this outlet is a 120-volt GFCI-protected receptacle to guard against sudden moisture issues. Think of that GFCI outlet as a built-in fail-safe for your yard. If things get too wet during a heavy downpour or a fast snowmelt, it trips the power in a split second, so nobody ends up getting a nasty shock. Managing Voltage Drop Over Long Distances Once the unit is securely mounted, the low-voltage cable is run from the terminals inside the box out to the yard. Dealing with voltage drop is honestly the trickiest part of the entire setup process for most DIY enthusiasts. As power travels down a long run of copper wire, it naturally loses some of its electrical punch along the way. If you run a wire too far, the lights at the very end of the line will look noticeably dimmer and yellower than the fixtures plugged in closest to the power source. Maintaining Your Investment Through the Seasons Once your system is correctly installed and running brightly, it is remarkably easy to maintain throughout the year. However, ignoring it completely is a common mistake, especially after severe weather rolls through the local area. A little preventative maintenance goes a tremendously long way in preserving your setup and catching minor issues early. Taking just a few minutes every season can literally add years to the lifespan of your illumination equipment. Routine Checks for Optimal Performance We highly recommend doing a quick, thorough walk-through of your property every few months to inspect the hardware. Check the main box to make sure the door is securely latched and that no insects, spiders, or mice have built nests inside. Check your individual fixtures to ensure they are standing straight up, as lawnmowers or heavy snow accumulation can easily knock them down. Finally, wipe down the glass lenses with a soft cloth to remove hard water spots from your lawn sprinklers or accumulated dirt. Troubleshooting Common Power Issues If you ever walk outside and notice a whole section of lights is out, the first place to check is the box itself. There is usually a built-in circuit breaker that can instantly trip if there is a power surge or a short in the yard. Simply flipping that little switch back on might solve the frustrating issue in a matter of seconds. It is a quick fix that often saves homeowners from a panicked phone call to an electrician. Enhancing Your Outdoor Lifestyle At the end of the day, good lighting does way more than just boost your curb appeal. It actually lets you use your whole yard long after the sun goes down, turning a dark patio into the perfect spot for late-night barbecues. You can finally kick back with a drink outside or take the dog out without fumbling around for a flashlight in the dark. It simply makes your entire property feel bigger, safer, and infinitely more welcoming every single night. It also adds a significant, proven layer of security to your home by eliminating dark hiding spots around your doors and windows. A well-lit exterior is one of the absolute strongest deterrents to unwanted visitors, giving your family absolute peace of mind while you sleep. By taking the time to fully understand the core components and choosing quality materials, you are making a smart property upgrade. You are setting yourself up for years of reliable, beautiful illumination that enhances your everyday life. Frequently Asked Questions Q. Can I leave my system turned on all night long? A. Yes, you can run them from dusk till dawn, and since LEDs barely sip power, it won't wreck your electric bill. Just ensure your main box isn't overloaded with too many fixtures so it doesn't overheat. Q. How long do these exterior units typically last? A. A heavy-duty stainless steel box should easily give you a solid 10 to 15 years through the roughest American weather. Just avoid the cheap plastic ones, because they always crack and let water in after a few freezing winters. Q. Do I need a licensed electrician to install one? A. You can completely handle burying the low-voltage wires in the mulch yourself without paying for city permits. But if your house doesn't already have an exterior GFCI outlet, you will definitely need to hire a pro to install one first. Q. Can I mix halogen and LED bulbs on the same wire? A. You can, but those old halogen bulbs hog so much power that they will cause major voltage drops and make your new LEDs look dim. Save yourself the headache and just stick to a 100% LED setup across your entire yard. Visit Larkin Landscape and Design to Get Started Today Creating a truly breathtaking nighttime environment takes a bit of planning, the right equipment, and an experienced eye for architectural design. We know that dealing with wires, calculating electrical loads, and selecting the perfect fixtures from a massive catalog can feel completely overwhelming. You certainly do not have to tackle this big exterior project entirely on your own without professional guidance. We have spent years helping homeowners design, build, and maintain stunning outdoor spaces that are built to last and look incredible. Ready to finally ditch the flashlights and actually use your yard at night? Give us a shout here at Larkin Landscape and Design . We'd love to come out, walk the property with you, and figure out a lighting setup that makes sense for your space and your budget. Let's get your house looking incredible from the street and build a backyard you actually want to hang out in after dark.
By Andrew Larkin March 11, 2026
When you look out into your backyard, do you see a lush, rolling landscape, or do you see a sloping mess that seems to wash away every time a heavy rainstorm hits? For many homeowners across the United States, managing the terrain of their property is a constant battle against the elements. If your yard isn't level, gravity is working against you 24/7. This is why the structural integrity and aesthetic beauty of a professional retaining wall installation come into play. It is an investment in the safety, usability, and financial value of your home, acting as the unsung hero of the landscape by providing a functional solution to one of nature’s most persistent problems: erosion. At Larkin Landscape and Design , we’ve seen firsthand how a strategic addition to your yard can do much more than hold back some dirt. When we talk about " landscaping ," people often think of flowers and mulch, but the hardscaping (the stone, the concrete, and the structural engineering) is what actually preserves the ground those flowers grow in. Without a solid plan to manage the slope of your land, you are essentially watching your property's value wash down the storm drains with every season. The Hidden Threat of Soil Erosion on Your Property Erosion isn’t just a buzzword for environmentalists; it is a real-time threat to your home’s foundation and your landscaping budget. When your property has significant slopes, water doesn't just soak into the ground; it gains momentum. As it moves downhill, it takes your expensive topsoil, mulch, and even your plants along with it. This creates ruts, washes out driveways, and leaves your yard looking neglected and raw. If you aren't sure if your property is suffering, look for these common red flags: Exposed tree roots that used to be underground. Bald spots in the lawn where grass refuses to take hold. Accumulation of silt or mud at the bottom of a hill after a storm. Cracks in your driveway or sidewalk near a sloped area. By implementing erosion control landscaping, you are putting up a shield for your property. You are telling the water where to go and ensuring that your soil stays exactly where you put it. This proactive approach saves you thousands of dollars in the long run by preventing landscape degradation and structural damage before it starts. How Retaining Walls Turn Slopes into Usable Space One of the biggest complaints we hear from homeowners with hilly yards is that they feel like they’re losing half of their property. You can’t easily kick a ball, set up a patio set, or plant a garden on a 45-degree angle. It’s "dead space." In many American suburbs where lot sizes are shrinking, losing 30% of your backyard to a steep hill is a significant loss of living area. A retaining wall changes the entire "usable" footprint of your land. By carving out a section of a hill and supporting it with a wall, you create a flat, tiered area. Suddenly, that unusable slope becomes a perfect spot for a stone patio, an outdoor kitchen , or a series of raised flower beds. You aren't just adding a wall, you’re adding square footage to your lifestyle. You’re creating outdoor rooms that didn't exist before. In the world of real estate, more usable land translates directly to a higher price tag. Buyers want a yard they can actually use, not a hill they have to struggle to mow. The Science Behind a Wall That Actually Lasts You may think that a retaining wall is just a stack of heavy blocks. However, there is a significant amount of engineering that goes into a wall that actually lasts through the seasons. If a wall isn't built correctly, the weight of the saturated soil behind it will eventually cause it to lean, crack, or completely collapse. We’ve all seen those DIY walls that look like they’re about to tip over; that’s exactly what you want to avoid. The most important part of any wall isn't actually what you see on the surface; it’s what is happening behind and underneath it. A solid wall requires a deep, compacted gravel base to prevent settling and shifting during the winter months. Even more importantly, it needs a dedicated drainage system. We use perforated pipes and clean drainage stones to ensure that water pressure (known as hydrostatic pressure) doesn't build up behind the stones. When water has a clear path to exit through "weep holes" or drainage outlets, the wall remains stable for decades. Boosting Your Home’s Resale Value Through Curb Appeal First impressions are everything when it comes to home values. When a potential buyer pulls up to a house, they aren't just looking at the siding and the roof. They are looking at the "structure" of the property. A yard that looks organized, well-maintained, and structurally sound sends a message that the entire home has been cared for. It suggests that the owner hasn't cut corners. A beautifully tiered front yard with integrated lighting and stone walls creates a sense of luxury and "permanence." It looks intentional and high-end. On the flip side, a yard with visible ruts from rainwater and a sliding hillside looks like a project, and projects scare away buyers who are looking for a move-in-ready home. By investing in quality masonry now, you are ensuring that when the time comes to sell, your home stands out as a premium listing in the neighborhood. Creative and Decorative Retaining Wall Ideas for Your Backyard Just because a wall has a job to do doesn't mean it has to look like a highway barrier. Modern landscaping materials offer a massive variety of textures, colors, and styles. Whether your home is a classic colonial, a rustic farmhouse, or a sleek modern build, there is a material that fits your aesthetic perfectly. When exploring decorative retaining wall ideas, consider how these elements can add character: Natural Stone Boulders: Great for a rough, natural style that fits well with the woods. Segmental Retaining Walls: These have a clean, uniform look and come in a wide range of color combinations. Timber Walls: Great for a budget-friendly, rustic feel in a garden setting. Integrated Lighting: Adding LED "cap lights" makes the wall look stunning at night while increasing safety. You can add "living walls" with plants growing through the cracks, or you can build "seat walls" around a fire pit that serve as both a structure and extra seating for guests. Using stone with different textures or making curved, flowing lines instead of sharp angles can make a wall look like it belongs in nature. Choosing Materials for the American Climate In the USA, our landscapes have to deal with everything from scorching summer heat to the brutal freeze-thaw cycles of winter. These temperature swings can be hard on badly-constructed hardscaping. For example, in the Northeast and Midwest, the ground expands and contracts a lot as it freezes. If your wall material is too brittle or the base isn't deep enough, the wall will "move," leading to cracks. We often recommend high-quality concrete pavers or natural stone for their durability. Concrete wall systems are engineered to interlock, providing massive strength while allowing for a tiny bit of flexibility. Natural stone, while often more labor-intensive to install, offers a timeless look that only gets better as it ages. The key is choosing a material that complements the local geography and can withstand the specific weather patterns of your region. Why Professional Design Beats a DIY Project Every Time We get it, the "weekend warrior" spirit is strong, and home improvement shows make everything look easy. But a retaining wall over three feet tall is a massive undertaking that carries a lot of liability. A wall failure can be dangerous and can actually devalue your property if it wasn't built to local building codes. Professional landscapers bring the right heavy equipment, the right materials, and the right experience. We know how to read the grade of your land, how to calculate the "surcharge" (the weight on top of the wall, like a parked car or a fence), and how to ensure the aesthetic matches the architecture of your home. When you hire Larkin Landscape and Design, you aren't just paying for labor, but you’re paying for the peace of mind that your yard won't be sliding toward your back door next spring. Sustainability and Environmental Upkeep In today’s world, we have to think about our environmental footprint. A yard that is eroding isn't just a problem for you; it's a problem for the local ecosystem. As soil washes away, it often carries fertilizers, pesticides, and chemicals into the local storm drains and eventually into our rivers and lakes. By stabilizing your soil with a retaining wall, you are acting as a good manager of the land. You’re preventing soil deposition in local ponds and keeping your local environment cleaner. Furthermore, by creating flat areas for planting, you can introduce more native greenery and trees, which provide shade, oxygen, and a habitat for local birds and pollinators. It’s a win-win for your property value and the planet. Protecting Your Property and Planning Your Next Outdoor Project At the end of the day, your home is likely your largest asset, and protecting the land it sits on should be a top priority. Retaining walls are the perfect combination of form and function; they stop the destructive path of erosion while turning useless hills into vibrant living spaces that add massive curb appeal. If you’re tired of watching your yard wash away or you’re ready to build that outdoor oasis you’ve been dreaming of, a well-designed wall is a permanent solution that pays dividends in both daily enjoyment and long-term home equity. At Larkin Landscape and Design, we aren’t just stacking blocks; we’re helping you reclaim your yard. Whether you’re facing a major structural challenge that needs some heavy-duty engineering or you want to finish off your garden with a clean, decorative border, our crew has the hands-on experience to handle it. We know that a landscape is more than just a project; it’s an investment in your home, and we build everything with the kind of durability that stands up to the elements year after year. If you’re ready to see what we can do for your specific property, take a look at our website at https://www.larklandscape.com/ to browse our latest work. There’s nothing like seeing a real transformation to get the ideas flowing for your own space. When you’ve seen enough and are ready to stop the erosion for good, reach out to us for a consultation. Let’s get together, talk through your vision, and start planning a landscape that looks great and stays put for the long haul.
By Andrew Larkin March 6, 2026
Do you ever look out at your backyard and feel like something is just missing? For a lot of us here in the States, our yards end up being mostly grass that we spend all weekend mowing, rather than a place where we actually want to hang out. If you really want to change the way you use your property, you have to look at the "structure" of the landscape. Hardscaping is what gives a yard its structure and its soul. It is the difference between a messy patch of dirt and a sophisticated area where you can host a dinner party or watch the sunset with a cold drink. Over our two decades of writing for the home improvement industry, we have seen how the right stone and wood elements can make a house feel twice as big. Whether you are dealing with a tiny city lot or a sprawling suburban spread, the goal is always the same: creating a space that feels like home. Let’s walk through ten of the best backyard hardscape ideas that will turn your outdoor area into the favorite "place" in your house. 1. Multi-Level Patios for a Custom Feel If your yard is totally flat, it can feel a bit like a parking lot if you pour one big slab of concrete. By breaking your patio into different levels, you create natural boundaries for different activities. You might have a high deck for your grill and a lower stone area for your lounge chairs. This layout also works wonders for properties that have a hill or a slope. Instead of fighting the land, you work with it to create a series of beautiful "steps" that lead you through the yard. It makes the whole space feel more expensive and much more intentionally designed. Use natural stone retaining walls to support the different elevations of your patio. Mix up the colors of your pavers to highlight where one level ends and another begins. Add some built-in planters along the edges of the steps to bring in some greenery. Ensure you have wide, sturdy stairs so that moving between levels feels easy and safe. 2. A Fully Functional Outdoor Kitchen Most of us love a good barbecue, but running back and forth to the kitchen inside for every fork or plate is a massive pain. A built-in outdoor kitchen changes the game by putting everything you need right where the action is. It keeps the chef in the middle of the party instead of stuck indoors. You can go as simple or as fancy as you want here. Some people want a stone enclosure for their grill and a bit of counter space, while others go all out with sinks, fridges, and even wood-fired pizza ovens. It is all about how you like to entertain and what makes your life easier. Using high-quality materials like stacked stone and granite ensures that your kitchen can handle the American weather year-round. It is an investment that pays for itself every time you host a summer bash. Plus, it is a huge selling point if you ever decide to put your home on the market in the future. 3. The Timeless Charm of a Stone Fire Pit There is something about a crackling fire that makes people want to sit down and talk for hours. A permanent, hardscaped fire pit is a huge upgrade over those flimsy metal ones that rust out after one season. It becomes a focal point that anchors the entire corner of your yard. You can choose a classic wood-burning pit for that authentic campfire smell, or go with gas for instant heat with zero cleanup. Either way, it extends your outdoor season by months. Even when the air gets chilly in the fall, you can still be outside enjoying the fresh air and the company of your friends. Build a wide stone ledge around the pit so people have a place to set their drinks. You can make a "fire zone" by putting heat-resistant pavers in a circle. Put some big wooden Adirondack chairs next to the pit for a classic American look. If you want a more private and warm space, think about a sunken fire pit design. 4. Retaining Walls That Do Double Duty If you live on a hilly property and need to keep soil from washing away, you may need to build retaining walls. However, they don't have to be ugly or strictly industrial. By building them at the right height, you can turn them into "seat walls" that provide extra spots for people to sit. This is a lifesaver when you have a big group over for a party. Instead of pulling out a bunch of mismatched folding chairs, people can hop up on the stone wall. It keeps the patio looking clean and organized while maximizing the number of people you can host at once. To make them more comfortable, you can use smooth capstones on top and throw on a few outdoor cushions. It is a smart way to solve a structural problem while adding massive value to your outdoor living space design. It gives your yard a structured, high-end look that lasts for decades. 5. Walkways That Lead the Way A yard without paths often feels like it's missing a sense of direction. People end up walking through the grass, which leads to mud being tracked into the house. A well-designed flagstone or paver walkway creates a flow that guides your guests from the back door to the garden or the patio. We always suggest adding some curves to your walkways. A straight line is efficient, but a curved path feels more organic and relaxing. It makes a small yard feel like it has more to explore. You can fill the spaces between stones with pea gravel or even low-growing groundcover like creeping thyme. Use large, flat flagstones for a rustic look that feels like it has been there forever. Opt for uniform pavers if you want a more modern and clean-lined aesthetic. Line the path with low-voltage LED lights so you can navigate safely after dark. Ensure the stones are set deep into a base of sand so they won't shift or wobble over time. 6. Shady Retreats with Pergolas and Pillars In many parts of the country, the afternoon sun can be absolutely brutal. A pergola is a fantastic way to get some relief while still feeling like you are outdoors. To make a pergola look truly high-end, don't just put the wooden posts in the ground; anchor them into stone pillars. This mix of wood and stone creates a beautiful architectural look that bridges the gap between your house and your garden. You can grow climbing roses or wisteria over the top to create a living roof that smells incredible in the spring. It is the perfect spot for a quiet Sunday morning with a book. If you want even more protection from the elements, you can look into a pavilion with a solid roof. This allows you to stay outside even if there is a light rain shower passing through. It adds a layer of luxury to your yard that makes every day feel like you are staying at a fancy vacation resort. 7. Creative Patterns with Custom Pavers One of the best things about modern hardscaping is the sheer variety of materials we have access to now. You aren't stuck with just one or two options. With custom paver patio ideas, you can play with different colors, shapes, and textures to create a look that is completely unique to your home. You can go for a herringbone pattern for a classic vibe, or a random layout for something that looks more like natural stone. Borders in a contrasting color can act like a frame, making the whole patio pop. It is your chance to show off your personal style and make your home stand out. Because pavers are individual units, they are also much better at handling the freeze and thaw cycle we get in many American states. If the ground shifts slightly, the pavers shift with it rather than cracking as a solid piece of concrete would. It is the smarter choice for a long-lasting and beautiful floor. 8. The Soothing Sound of Water Features If you live in a busy neighborhood, you know how annoying the sound of traffic or loud neighbors can be. A water feature is the best way to reclaim your peace. The sound of a stone waterfall or a bubbling fountain creates a "sound curtain" that masks the noise of the outside world. You don't need a huge pond to get the benefits. A pondless waterfall is a great option because the water recirculates through a hidden tank underground. It is low maintenance, safe for kids and pets, and looks completely natural. It brings a sense of calm to your yard that is hard to get any other way. Install a small bubbling urn fountain in a corner of the patio for a subtle effect. Build a stone water wall for a sleek, modern look that takes up very little space. Use underwater lights to make the water shimmer and glow once the sun goes down. Surround your water feature with river rocks and ferns to complete the natural look. 9. Lighting Built Right into the Stone We often see people spend a fortune on their landscaping and then leave it totally dark at night. That is a huge missed opportunity. By building lights directly into your stone walls, steps, and paths, you make your yard usable 24 hours a day. It adds a magical glow that makes everything look better. Low-voltage LED lighting is the way to go here. It is cheap to run and very easy to install during the construction of your hardscape. It isn't just about looks, either; it is a major safety feature. You want your guests to be able to see the steps and the edges of the patio clearly so nobody takes a spill. You can even get smart lighting systems that you control from an app on your phone. You can dim the lights for a romantic dinner or turn them all the way up if you are looking for a lost set of keys. It is the final touch that makes a professional landscape feel complete and truly high-end. 10. A High-End Driveway That Pops We usually think of hardscaping as something for the backyard, but don't ignore the front of your house. Your driveway is a key element of how your home looks from the street. If you replace your broken asphalt driveway with beautiful stone pavers, people will see your property in a completely different way from the street. Paver driveways are quite strong and can easily hold the weight of big trucks and SUVs. If you ever get an oil stain or a crack, you can replace the few affected stones instead of having to repave the whole thing. It is a premium upgrade that makes your house the most attractive one on the entire block. Matching the style of your driveway to your back patio creates a sense of harmony. It shows that the whole property was designed as one cohesive unit. It is a big project, but the impact it has on your home's value and your daily pride of ownership is absolutely worth the effort. Conclusion At the end of the day, your yard should be a place where you actually want to be. Whether you are dreaming of a massive outdoor kitchen or just a quiet stone path through your garden, hardscaping is the key to making it happen. It provides the structure that allows your lifestyle to move outdoors. Don't worry if you're feeling overwhelmed by all the choices. You don't have to do everything at once. Start with the feature that will make the biggest difference in how you live. The team at Larkin Landscape and Design is always ready to help you figure out the best plan for your specific needs and budget. We love helping homeowners take back their yards and turn them into something spectacular. To see some of our recent transformations or to chat about your own ideas, visit us at https://www.larklandscape.com/ whenever you are ready. Let's build a space that you and your family will love for years to come!
By Andrew Larkin February 27, 2026
Let’s be honest, sometimes looking at a small backyard can feel a bit discouraging. You might dream of sprawling patios, outdoor kitchens, or massive garden beds, only to look outside and see a patch of grass that seems barely big enough for a lawn chair. But here is the thing we have learned over our years at Larkin Landscape and Design : a small yard is not a limitation; it is just a different kind of canvas. In fact, some of the most stunning, cozy, and functional outdoor spaces we have designed right here in the USA have been on properties with limited square footage. When you don’t have acres to hide behind, every detail counts. Every paver, every shrub, and every light fixture has to pull its weight. That is where the magic happens. If you are staring at your compact yard and wondering how on earth to fit in a grill, a dining area, and maybe even a fire pit without it feeling cluttered, you are in the right place. We are going to walk you through how to blend hardscape and landscape to make your small space feel twice as big. The Foundation: Rethinking Hardscapes for Small Spaces When people think of “hardscaping,” they often picture massive retaining walls or expansive driveways. But in a small yard, hardscaping is your best friend because it defines functionality. In a large yard, you can have a floating patio somewhere in the distance. In a small yard, the landscape often is the yard. The biggest mistake we see homeowners make is trying to shrink everything down. They think, “small yard, small patio.” The problem is, a tiny postage-stamp patio actually makes the yard look smaller (and feels cramped when you try to sit on it). Paradoxically, extending your hardscaping almost to the edges of the property line can actually make the space feel grander. It draws the eye to the perimeter, maximizing the usable footprint. Choosing the Right Materials For a small yard hardscape, material selection is critical. Large, oversized pavers can actually make a space feel less busy and more open compared to tiny, intricate bricks, which create a lot of visual “noise.” We often recommend smooth, light-colored stones or pavers. Lighter colors reflect light, which naturally opens up a cramped area, whereas dark materials can absorb light and make things feel closed in. Another trick is the angle of installation. Laying pavers on a diagonal (a 45-degree angle to the house) creates an optical illusion that pushes the boundaries of the space outward. It’s a simple geometry hack, but it works wonders for making a narrow row home yard or a tight suburban lot feel wider. Softening the Edges: Strategic Landscaping While hardscaping provides the “floor” of your outdoor room, landscaping provides the walls and the ceiling. In a small yard, you don't have the luxury of planting massive oaks or sprawling weeping willows. You need plants that work hard without taking over. We love using layering to create depth. Instead of just a flat fence, imagine a layer of tall, slender ornamental grasses or columnar evergreens along the perimeter. In front of that, some mid-sized flowering shrubs, and finally, low-growing ground cover near the patio edge. This “bleacher seating” arrangement of plants draws the eye up and back, creating a sense of volume that a flat lawn can't match. Vertical Gardening If you can’t go out, go up. Vertical gardening is a buzzword for a reason. In tight spaces, your fences and exterior walls are prime real estate. Installing trellis systems for climbing vines like clematis or jasmine adds lush greenery without eating up valuable square footage. Hanging planters and wall-mounted garden pockets are also fantastic. They allow you to introduce color and texture at eye level, breaking up the monotony of a privacy fence. This technique blurs the boundaries of your property. When you can’t quite see exactly where the yard ends and the fence begins because of lush foliage, the space feels infinite. The Art of Zoning: Small Backyard Design with Purpose One of the most effective ways to maximize a small yard is to create distinct zones. It sounds counterintuitive, chopping up a small space, but it actually creates a journey. If you can see the entire yard and every corner of it from the back door, your brain registers it as “small.” If there is a slight separation, a hidden corner, or an elevation change, your brain perceives it as a larger, multi-faceted environment. The “Outdoor Room” Concept Treat your backyard like an extension of your indoor living space. You might have a “cooking zone” with your grill and a small prep table, distinct from a “lounging zone” with comfortable seating. You can separate these areas using: Change in materials: The dining area may be on pavers, while the lounge area is on a patch of high-quality artificial turf or pea gravel. Area rugs: Yes, outdoor rugs work just as well outside to define a space as they do inside. Planters: A row of tall, rectangular planters can act as a "room divider" that is much softer and friendlier than a wall. We worked on a project recently where we used a low seat wall to separate a fire pit area from the rest of the patio. Not only did it define the zone, but the wall itself provided extra seating, eliminating the need for bulky chairs that would have cluttered the design. Multi-Functional Features In a small yard, everything needs to double up. We are huge fans of built-in bench seating. A standalone bench takes up space and leaves “dead zones” behind and underneath it. A built-in bench integrated into a retaining wall or a deck railing maximizes every inch. Plus, you can build storage into the seat itself, perfect for stowing away cushions or gardening tools when they aren't in use. Fire features are another area where dual-purpose design shines. A massive stone fireplace might overwhelm a small yard, but a fire table is perfect. When the fire is lit, it’s ambiance and warmth. When it’s off, you can put the cover on, and it serves as a coffee table for drinks and snacks. Visual Tricks to Expand Space As designers, we have a toolkit of visual tricks to fool the eye. One of our favorites is the use of mirrors. It sounds like something from Alice in Wonderland, but hanging a weather-resistant mirror on a fence or a shed wall reflects light and greenery, effectively “doubling” the view. Just be sure to position it so it reflects plants, not the garbage cans. Lighting is another game-changer. In a small yard, corners can disappear into darkness at night, making the space feel like a tiny box. By using up-lighting on trees or fences in the corners of the yard, you push the visual boundaries back out. Bistro lights strung overhead are also fantastic for small spaces. They draw the eye upward, emphasizing the vertical space and creating a cozy, “ceiling” effect that feels intimate rather than claustrophobic. Solving the Storage Dilemma Clutter is the enemy of small spaces. A hose reel lying around, a bag of charcoal, or kids' toys can make a small patio feel chaotic instantly. We always encourage clients to think about storage solutions that blend in. Consider a shed that mimics the architectural style of your home, so it looks like a deliberate feature rather than an afterthought. Or, use a storage bench as mentioned earlier. Even your trash can enclosure can be beautiful, a cedar screen that hides the bins while adding a nice wood texture to the yard. Embracing the “Cozy” Factor Finally, we always tell our clients to lean into the smallness. There is something inherently charming and safe about a small, enclosed garden. It feels like a secret sanctuary. You don’t need to pretend you have a rolling estate. Embrace the intimacy. High privacy fences, overhead pergolas, and dense planting can turn a small yard into a private retreat that blocks out the neighbors and the noise of the street. When you stop fighting the size of your yard and start designing for it, the results are often better than you could have imagined. A small yard means less grass to mow, less mulch to spread, and less maintenance overall. That leaves you with more time to actually sit out there with a cold drink and enjoy it. Small Yard Landscaping: Plant Selection 101 Let’s dive a little deeper into the green stuff. In the US, we have such a diverse climate range, but the principles of small yard planting remain pretty consistent. You want plants that offer multi-season interest. In a large landscape, you can have a shrub that only looks good for two weeks in May because you have fifty other plants to look at the rest of the year. In a small yard, that shrub is taking up 10% of your visual field. It needs to earn its keep. Here are a few of our absolute favorite plants for maximizing tight spaces: Sky Pencil Holly: This is a lifesaver for privacy. It grows tall and skinny (like a pencil), meaning you can plant a row of them along a fence line without losing three feet of yard space to branches. Dwarf Hydrangeas: Varieties like the ‘Bobo’ hydrangea give you massive flower power but stay compact (under 3 feet). You get that classic American garden look without the bush taking over your patio. Japanese Maples: These provide stunning architectural structure and vibrant fall color without growing 50 feet tall. They act as a beautiful focal point that doesn't block out the sun. Creeping Thyme: Instead of mulch or grass between pavers, try creeping thyme. It smells amazing when you step on it, handles foot traffic well, and softens the look of stone. Espaliered Fruit Trees: This is an old technique where trees are trained to grow flat against a wall. You can harvest apples or pears right off your fence without the tree taking up any “floor space.” We also love using pots and containers. They allow you to move plants around. If a plant isn't looking its best, you can tuck it behind a chair. If you're hosting a party, you can move the pots to the corners to open up floor space. It gives you the flexibility that in-ground planting doesn't always offer. 5 Common Mistakes to Avoid Over the last two decades, we've seen plenty of DIY attempts that went a little sideways. To help you avoid those pitfalls, here is a quick checklist of what not to do when designing for a small footprint: Thinking “Small” Means “Tiny Features”: Don't clutter the yard with tiny furniture and small pots. One large seating area feels more spacious than three cramped ones. Using Too Many Materials: Stick to a simple palette. Mixing brick, stone, gravel, and wood in a 20x20 space looks chaotic. Pick two primary materials and stick to them. Forgetting the Front Yard: If your backyard is tiny, don't forget the front. A small bistro table on a front porch can double your outdoor living options. Ignoring Winter Interest: In a small yard, you see everything. If all your plants die back in winter, you're staring at mud for four months. Ensure you have evergreens for a year-round structure. Blocking Sight Lines: Keep taller plants to the perimeter. If you put a tall bush right in the middle of the yard, it visually cuts the space in half. Dealing with Slopes in Small Yards If your small yard is also hilly, you might feel doubly cursed. But slopes are actually an opportunity for terracing. Terracing a slope with retaining walls creates flat, usable tiers. You might have a dining tier on the upper level and a fire pit tier on the lower level. This naturally zones the space and adds a tremendous amount of architectural interest. Retaining walls in small spaces can also double as seating walls, as we discussed. A nice capstone on a retaining wall is the perfect height for sitting, meaning you don't need to clutter your lower patio with extra chairs. The Importance of Flow Flow is about how you move through space. In a small yard, you can't have obstacles. The path from the back door to the grill, and from the grill to the table, needs to be clear. We often use curvilinear lines in small yards. A curved path disappears around a bend (even a slight one), hinting that there is more to see, whereas a straight path reveals everything at once. However, if your home is very modern and geometric, sticking to clean, straight lines (rectilinear design) can keep the space feeling orderly and uncluttered. The key is consistency. Don’t mix a winding cottage path with a sleek, ultra-modern concrete patio in a 20x20-foot yard. It will just look messy. Final Thoughts Transforming a small yard is really about editing. It’s about deciding what is most important to you, is it dining? Lounging? Gardening and prioritizing that. You might not be able to fit a pool, a vegetable garden, AND a dining table for twelve. But you can fit a stunning water feature, a vertical herb garden, and a cozy dining nook for four. At Larkin Landscape and Design, every square foot has potential. Whether you are dealing with a narrow side yard, a tiny urban courtyard, or just a modest suburban backyard, the principles of good design remain the same: scale, proportion, and functionality. Your small yard doesn’t have to be a holding area for the dog or a place to store the grill. With the right mix of hardscape and landscape, it can become your favorite room in the house. It’s all about looking at the space you have and seeing not what it lacks, but what it can become.
By Andrew Larkin February 26, 2026
If you live in Iowa, you know that the change of seasons isn't just a calendar event; it’s a physical force. We go from humid, 90-degree summers to bone-chilling winters where the ground freezes solid, only to thaw out and do it all over again a few weeks later. For homeowners, this cycle is the ultimate test for anything built outside, especially the patio. When you’re planning an outdoor living space , you’re usually thinking about summer BBQs, fire pits, and watching the kids play. But as a professional who has spent two decades watching how materials age in the American Midwest, we can tell you that you should really be thinking about January. Specifically, you should be thinking about the "freeze-thaw cycle." The big debate usually boils down to two choices: pavers or stamped concrete. Both look great on day one, but after five or ten Iowa winters, they tell very different stories. Let’s get into the paver patio vs stamped concrete debate to see which one actually survives the long haul. The Invisible Enemy: The Freeze-Thaw Cycle Before we look at the materials, we have to understand what we’re up against. When the temperature drops below 32°F, the moisture in the soil freezes and expands. This causes the ground to "heave" upward. When it warms up, the ice melts, the volume decreases, and the ground settles. In a state like Iowa, this doesn't just happen once a year. It happens dozens of times between November and March. If your patio is one solid, rigid piece of material, it has nowhere to go when the ground moves. It either has to be strong enough to resist thousands of pounds of pressure, or it’s going to break. This is where we see the most freeze-thaw patio damage occurring. Stamped Concrete: The Rigid Contender Stamped concrete is a popular choice for many reasons. It’s essentially a large slab of concrete that is poured, leveled, and then stamped with a pattern to look like stone, brick, or wood. It is then stained or colored to give it a high-end look. In the short term, it’s beautiful. It’s also usually faster to install than individual pavers, which often leads to a lower initial price tag. However, the very thing that makes concrete easy to pour, the fact that it’s one continuous sheet, is its greatest weakness in cold climates. Even with "control joints" (those lines cut into the concrete to encourage it to crack in straight lines), concrete is prone to wandering cracks. When the ground underneath shifts during an Iowa freeze, the slab is under immense tension. Eventually, that tension finds a weak spot. One of the most frustrating things for homeowners is seeing stamped concrete cracking in winter. Unlike a small crack in a sidewalk, a crack in a stamped patio ruins the aesthetic. Because the surface is colored and textured, patching it is nearly impossible to do invisibly. You end up with a "scar" that never quite matches the rest of the patio. Furthermore, once water gets into those cracks, the next freeze-thaw cycle expands the gap, making the damage worse every single year. Paver Patios: The Flexible Solution Now, let's look at the alternative. A paver patio is made of individual units (usually concrete, clay, or natural stone) set on a prepared base of compacted gravel and sand. The "secret sauce" of pavers is that they are an interlocking system. They aren't glued together or held in place by a rigid bond. Instead, they are held by friction and polymeric sand in the joints. This creates a "flexible pavement." When the ground in Iowa heaves in January, the pavers move independently. They can shift up a fraction of an inch and then settle back down when the thaw comes. Because there are thousands of tiny joints across the patio, the pressure is distributed rather than being concentrated on one solid slab. This flexibility is why many experts consider pavers the best patio material for cold climates. If a paver ever does crack, which is rare because they are manufactured to be much stronger than poured concrete, you pop that one unit out and slide a new one in. You don’t have to tear up the whole patio or live with an ugly patch job. Why the Base Matters More Than the Surface Whether you choose concrete or pavers, your patio is only as good as what’s underneath it. In the Midwest, we have to dig deep. If a contractor tells you they can pour concrete on top of your existing dirt, run the other way. A proper installation requires a deep "frost-protected" base. This involves digging the soil and replacing it with layers of crushed stone that are compacted to be rock-solid but still allow for drainage. Water is the enemy. If water can drain through the base and away from the patio, there is less moisture to freeze and expand. Pavers naturally allow for better drainage because the joints between them act as tiny channels. When we talk about patio options for Iowa weather, drainage is usually the deciding factor between a patio that lasts 30 years and one that looks "tired" after five. Aesthetics and the "Iowa Look" We also have to consider how these materials handle the secondary effects of winter: salt and shoveling. Iowa winters mean snow removal. Stamped concrete is slippery when wet or icy, and if you use a metal shovel, you risk scratching the sealer or the color right off the surface. Even worse, de-icing salts are incredibly hard on poured concrete. They can cause the surface to "spall" or flake off, leaving ugly grey pits in your beautiful stamped design. Pavers, especially high-quality concrete pavers from brands like Unilock or Belgard, are designed to be salt-resistant. They are also manufactured under intense pressure, making them much denser and less porous than poured concrete. This means they don't soak up water and salt as easily, which preserves their look for decades. The Real Cost: Initial vs. Lifetime We won't lie to you: a paver patio normally costs more up front than stamped concrete. Setting each stone by hand and making sure the base is precisely level takes more work. But as someone who has been in this industry for 20 years, we always ask our clients to look at the "Lifetime Cost." 1. Concrete: Lower initial cost + expensive repairs + eventual replacement when the cracks become too much. 2. Pavers: Higher initial cost + virtually zero repair costs + 30 to 50-year lifespan. When you factor in the value it adds to your home, pavers almost always win. Real estate experts often note that a well-maintained paver patio retains its value far better than a cracked concrete slab. In a market like ours, savvy buyers know the difference. Making the Right Choice for Your Home So, what holds up best? If you want a "one and done" solution that can handle the brutal swings of the weather, pavers are the clear winner. They are designed to work with nature rather than fighting against it. However, we know every homeowner's budget and goals are different. If you are looking for a short-term aesthetic upgrade and are okay with the maintenance requirements of concrete (like resealing every 2 to 3 years), stamped concrete can be a viable option. But you have to go into it with your eyes open to the risks of the Iowa climate. At Larkin Landscape and Design , we’ve seen every type of failure and success imaginable. We’ve spent years refining our installation process to ensure that when we build a patio, it stays level and beautiful through the hottest July and the deepest February. Your outdoor space should be a place of relaxation, not a source of stress every time the temperature drops. By choosing materials that are engineered for our specific environment, you’re not just building a patio; you’re making a long-term investment in your home’s livability. If you’re ready to start planning your backyard transformation, let’s talk about how we can build something that stands the test of time. Whether it’s a small space for morning coffee or a massive outdoor kitchen for the whole neighborhood, we’ll make sure it’s built to handle whatever the Iowa sky throws at it.
Iowa Spring Lawn Care: The Ultimate Monthly Plan
By Andrew Larkin February 13, 2026
Revive your winter lawn with our complete Iowa spring lawn care checklist. Discover month by month tips for a lush green yard. Read the full guide now.
Paver Patio Installation Iowa
By Andrew Larkin February 10, 2026
Planning a new backyard? Discover the real cost of Paver Patio Installation Iowa homeowners should expect. Get expert design tips and book your free quote now.
landscape lighting design
By Andrew Larkin January 21, 2026
Learn how professional landscape lighting design boosts curb appeal and keeps your family safe at night. Click to start planning your dream outdoor space.
Rock vs Mulch Iowa: The Best Choice for Your Local Yard?
By Andrew Larkin January 14, 2026
Discover the truth about rock vs mulch in Iowa landscapes. We break down costs & weed control to help you choose right. Click here to decide today.
By Andrew Larkin January 6, 2026
The 4 a.m. Alarm: An Iowa Winter Reality If you’ve lived in Iowa for more than a single winter, you know the sound. It’s not your alarm clock, it’s the muffled ‘scrape-scrape-scrape’ of a shovel hitting concrete before the sun even comes up. Iowa winters are beautiful, sure. The blanket of white over the cornfields is postcard-perfect, until you have to drive through it to get to work or open your shop for customers. That’s when the reality sets in: snow isn’t just weather here, it’s a logistical hurdle. At Larkin Landscape , we’ve spent years battling Iowa’s unpredictable elements, from those heavy, wet snowfalls in December to the biting ice storms of February. One question we often hear from our neighbors in Des Moines , Ankeny, and Iowa City is, "Is there really a difference between hiring someone for my driveway and hiring a crew for my business?" The short answer? Yes. The long answer? It comes down to two things: urgency and liability. Let’s grab a warm cup of coffee and dive into what separates residential snow plowing services from commercial ice management, and why knowing the difference matters for your peace of mind. Residential Snow Removal: Reclaiming Your Morning For homeowners, snow removal is personal. It’s about getting the kids to school safely and not throwing out your back before your first meeting. When you hire a pro for residential snow removal in Iowa, you’re essentially buying time. You’re paying for the luxury of hitting the snooze button while someone else handles the heavy lifting. 1. The Scope is Smaller (But Details Matter) Residential jobs are typically about precision in tight spaces. We aren't clearing acres of asphalt, we’re navigating around your kid’s basketball hoop, your meticulously planted boxwoods, and that one car parked a little too close to the edge of the driveway. Equipment here is different, too. While we might bring a plow truck for a long driveway, we often rely on snow blowers and shovels for the detail work. Why? Because a massive commercial plow can do a number on a residential lawn if you aren't careful. We treat your property like our own, ensuring the snow is moved away from the house (to prevent wet basements when it melts) without burying your mailbox. 2. The Schedule is Life-Dependent Residential triggers are usually simpler. Most homeowners want service after the snow stops falling or reaches a certain depth (usually 2 inches). The goal is clear access. You need to get out of the garage, and the mail carrier needs to get to the door. It’s about restoring the flow of your daily life. Commercial Snow Removal: The Zero Tolerance Game If residential snow removal is about convenience, commercial snow removal is about risk management. For business owners in Iowa, snow isn't just an inconvenience, it’s a liability lawsuit waiting to happen. If a customer slips on a patch of black ice outside your storefront, the consequences are far heavier than just a wet pair of pants. This is where the term ice management takes center stage. 1. It’s Not Just About Moving Snow; It’s About Melting Risk Commercial contracts are intense. We operate with what we call a "zero tolerance" policy for ice. In a residential setting, a little hard packed snow on the driveway might be acceptable for a few hours. In a commercial lot? Absolutely not. This means we aren't just plowing, we are pre-treating surfaces with brine or salting immediately after clearing. Sidewalk clearing becomes a high stakes game. We have to ensure that handicap ramps, loading docks, and emergency exits are down to the pavement. 2. The 24/7 Monitoring Cycle Unlike residential routes that might run once the storm passes, commercial snow removal in Iowa is a round the clock operation. Imagine a hospital entrance or a 24-hour gym. We can’t wait for the snow to stop. We are often out there during the storm, making multiple passes to keep lanes open. We monitor weather radar specifically for ground temperature drops to predict when wet pavement will turn into a skating rink. 3. Heavy-Duty Artillery Remember those snow blowers we mentioned for homes? They rarely cut it here. Commercial jobs require skid steers, frontend loaders, and massive V-plows to stack snow into designated snow piles that won't block visibility for drivers. We have to plan where the snow goes before the first flake even falls, ensuring it doesn't melt and refreeze across the parking lot later. The Science of Salt: It’s Not Just Sprinkling Magic Dust You might think throwing salt down is the universal fix, but in Iowa, it’s actually a science. One thing many people don’t realize is that standard rock salt loses its effectiveness when temperatures dip below 15°F. In January, when we hit those sub-zero wind chills, throwing cheap salt on your sidewalk is like throwing gravel, it won’t melt a thing. This is where the difference in service really shines. For our residential clients, we’re hyper-aware of your landscape and your furry friends. We often use blended products that are gentler on concrete and safe for Fido’s paws. Over-salting a driveway can burn your grass come spring, leaving you with brown edges that are a pain to fix. On the commercial side, however, we often have to use more aggressive treated salts or liquid brine. We can’t risk a ‘slip and fall’ lawsuit, so we use products designed to cut through ice even in extreme cold. It’s a balancing act between safety, budget, and environmental care that requires a professional touch to get right. The Iowa Factor: Why Local Expertise Wins Whether it’s residential or commercial, the Iowa Factor changes the game. Our weather doesn't follow a script. We get those wintry mixes, rain turning to sleet turning to snow, that create a concrete like layer of ice underneath the fluff. National chains that manage snow removal from a call center in a different time zone often miss these nuances. They don't know that the wind whips across the open plains of Central Iowa, causing massive drifts on north facing driveways even after the snow has stopped. At Larkin Landscape, we are local. We know that in Ankeny, the wind chill can freeze a wet sidewalk in minutes. We know the local ordinances in Des Moines regarding how quickly public sidewalks need to be cleared (usually 24 hours). A Human Approach to a Cold Job: We believe that whether you are a frantic mom needing to get the minivan out or a property manager worrying about tenant safety, you deserve a human response. You aren't just a route number to us. ● For our Residential Clients: We promise to respect your property boundaries and your sleep schedule as best we can. ● For our Commercial Clients: We promise documentation. We keep logs of when we plowed and when we salted, protecting you if a liability claim ever arises. Which Service Do You Need? If you are reading this and wondering, "Do I need a commercial contract for my large rural driveway?" or "Can I just hire a neighborhood kid for my small business lot?", here is a quick rule of thumb: ● Traffic Volume: If you have strangers (customers/employees) walking on your property daily, you need commercial grade ice management and insurance protection. ● Tolerance for Delays: Can you wait until the storm ends to leave your house? Residential service is a perfect fit. Do you need the lot clear by 7:00 a.m. sharp regardless of when the storm hit? That’s a commercial necessity. Ready for Winter? Winter in Iowa is inevitable, but the stress that comes with it doesn't have to be. Whether you need your front walk cleared or a shopping center maintained, Larkin Landscape has the local know-how to keep you moving. Don't wait for the first blizzard warning to start Googling "snow plowing services." By then, our schedules and our mugs of hot cocoa are already full. Contact Larkin Landscape Today to discuss your winter plan. Let’s keep Iowa safe, one cleared sidewalk at a time.